- Safety
- Sweet Spot
- Stop Printing (you are here)
- Comfort
How To Stop Printing
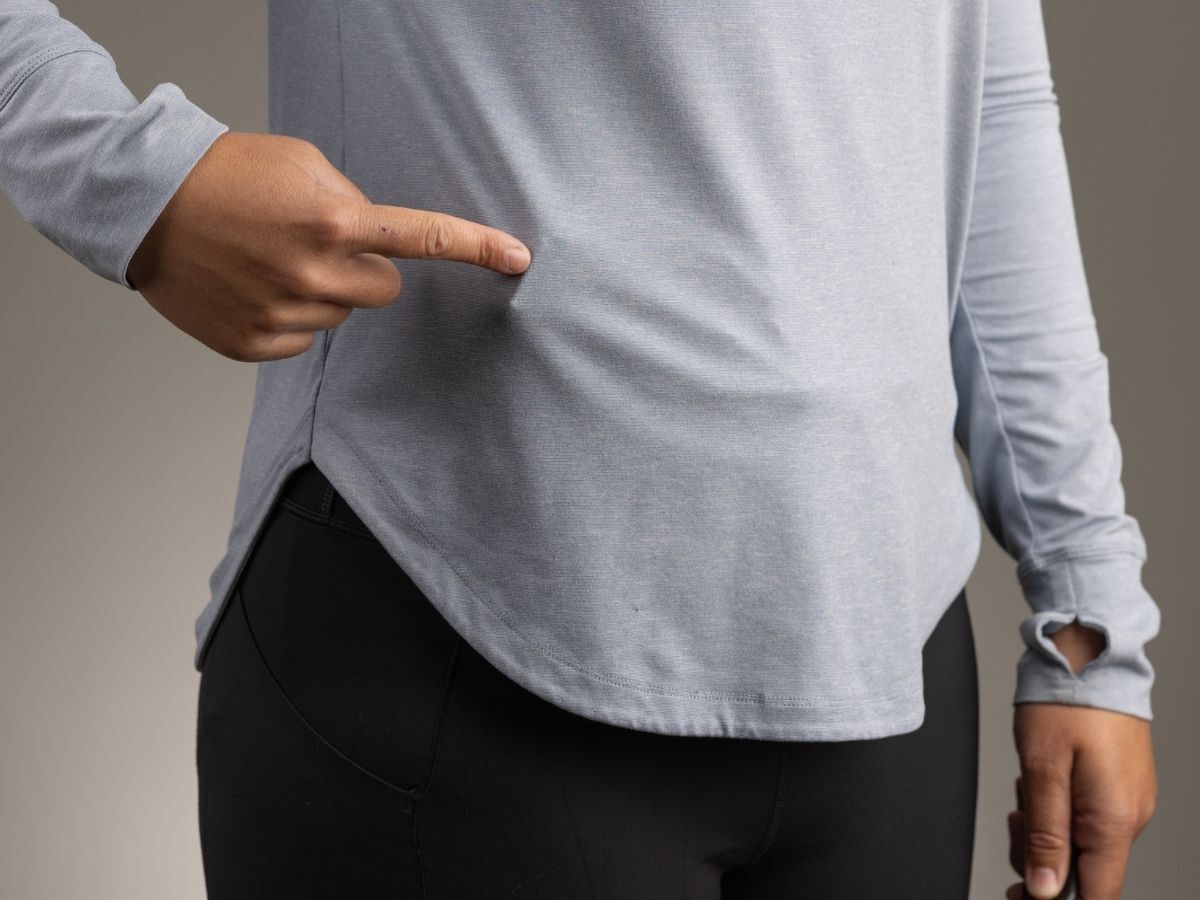
Position → Diagnose → Correct
In the last chapter, you found your ideal carry position, and found your concealment Sweet Spot. But your gun is still printing. Now what?
This is actually quite normal! Bodies are all shaped differently, but holsters are not. So the next step is to make adjustments to your holster to better fit your body's contours.
This is the diagnostic portion of that process for improving your concealment. We'll show you a simple test you can use any time you want to solve a printing issue. It's called Poke and Check, and it's exactly as easy as it sounds.
Poke and Check - How To Get the Gun to Conceal
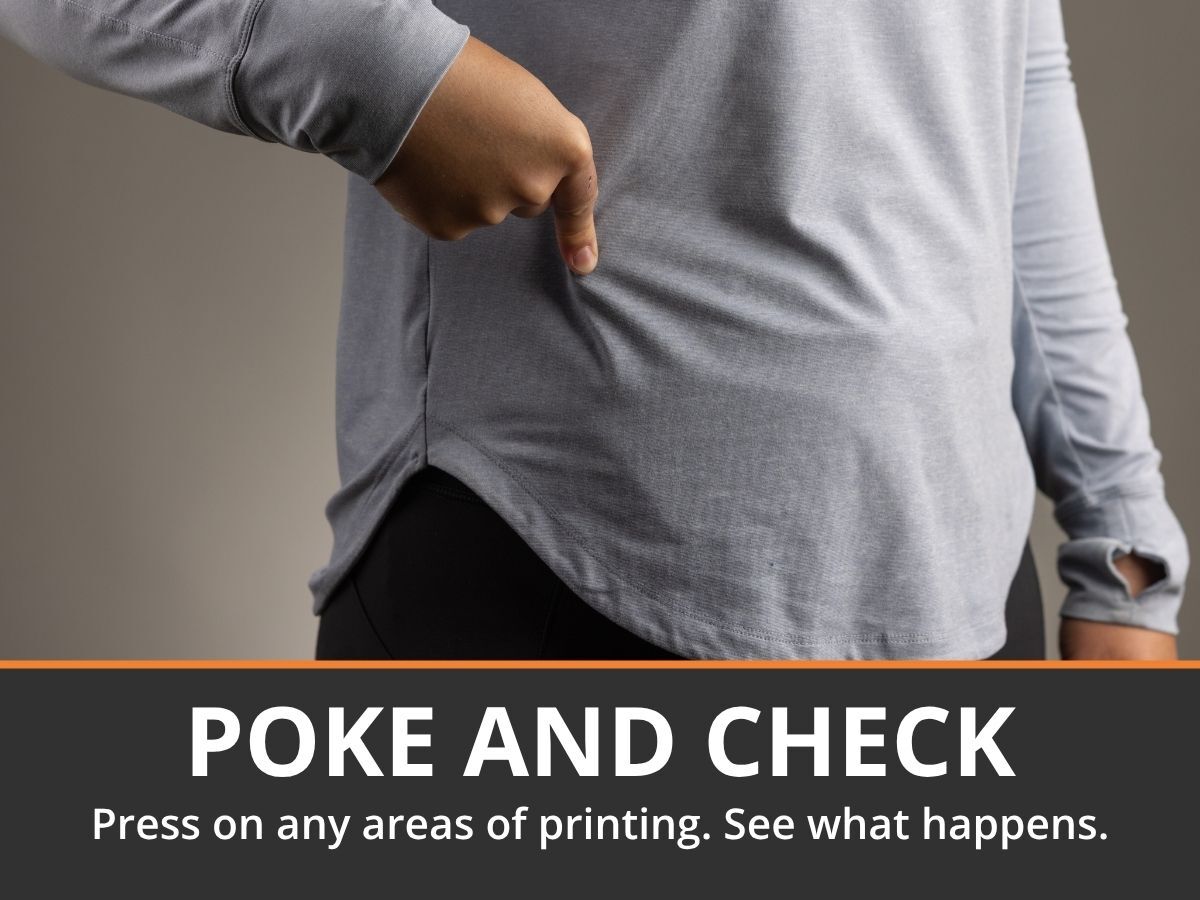
Once you've found your Sweet Spot, the next step is to make your gun lay as flat as possible against your body. The more it sticks out, the more your clothing will get hung up and look unnatural - this is called printing. When the gun is tucked in tight against your body, your clothing can flow around it, reducing printing and giving you better concealment.
The goal is to get to your Maximum Concealment Potential: that's when you have the gun in your sweet spot, with all your concealment mechanics fully maxed out to give you the best possible concealment with that firearm. When you're at your MCP, you have the most freedom to wear what you want, rather than having to dress around a gun that's poorly concealed.
Leave nothing on the table.
Maximum Concealment Potential is when your concealment is as good as it can possibly get with that particular gun.
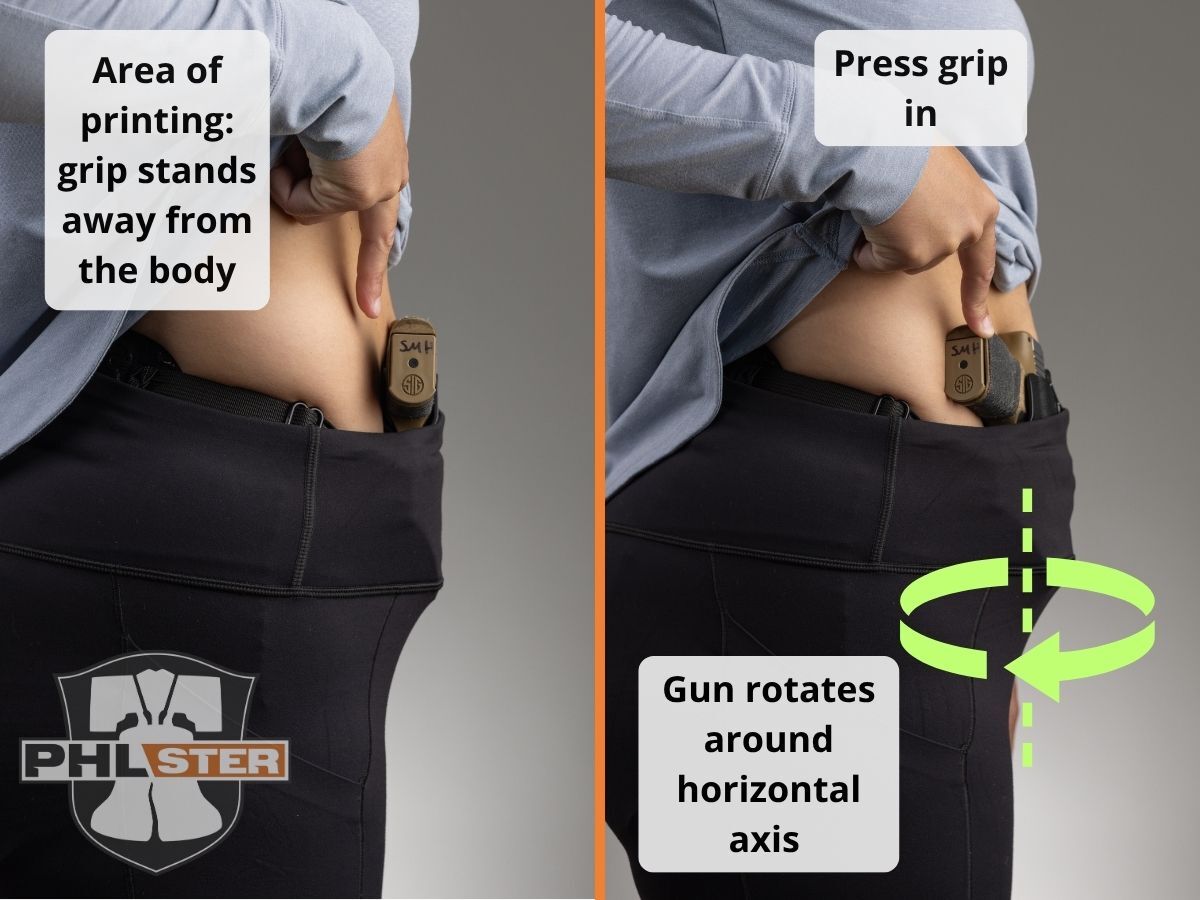
So how do you know what holster features you need to get to your MCP? That's where the Poke and Check comes in. Put on your holstered gun, and look to see any areas of printing. If you see any places where the gun isn't tight to your body, POKE them! For example, if your grip is printing, press in on it. Observe how the gun rotates horizontally, or tucks vertically, to get closer to your body. Every action has an equal and opposite reaction. This insight tells you what holster features you will need to get better concealment.
Test your knowledge! Observe how the gun moves when it's poked. What kind of correction does each holster need?
QUIZ: What features does this holster need?
WING. A wing acts as a lever, which converts the pressure of your belt into rotational force. When you tighten your belt over the wing, it pulls the grip of the gun closer to the body.
When you do the Poke and Check, watch how the gun moves. When you press in on the grip, if you see the gun rotate towards your body, you need a wing.
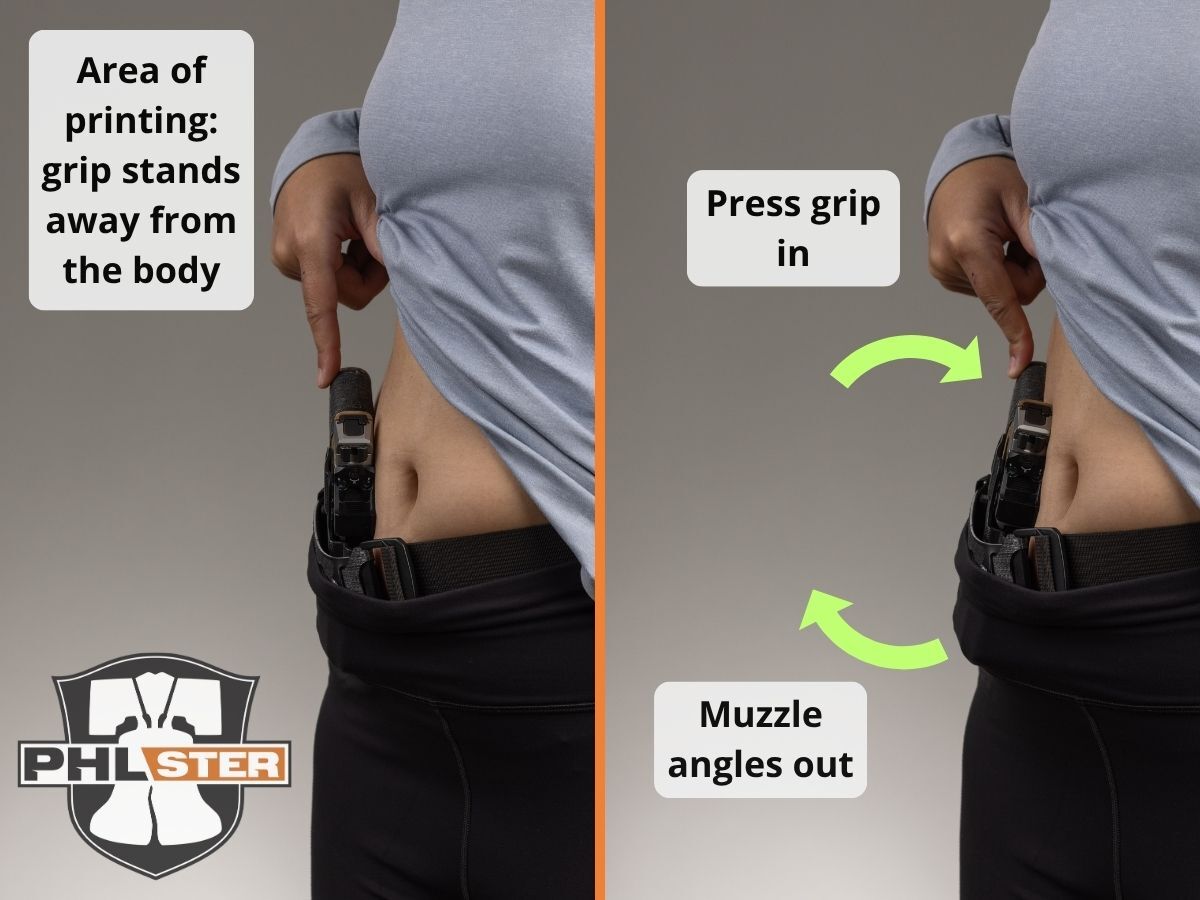
QUIZ: What features does this holster need?
WEDGE. A wedge helps your holster tuck tight to your body in two ways. One, it acts as a fulcrum around which the holster can tilt. Two, it helps fill in any gaps between the holster and the body, improving concealment and comfort.
Press in on the spots where your gun is printing. If you see the muzzle end of the gun tilt away from your body, that tells you a wedge is needed.
You'll learn about holster features in the next sections, but first, watch the video below to see the Poke and Check in action.

Short on time? Skip ahead to Concealed Carry Comfort →
Need more clarity? Keep reading below for a detailed deep dive on wings, wedges, and belt pressure.
Holster Wings
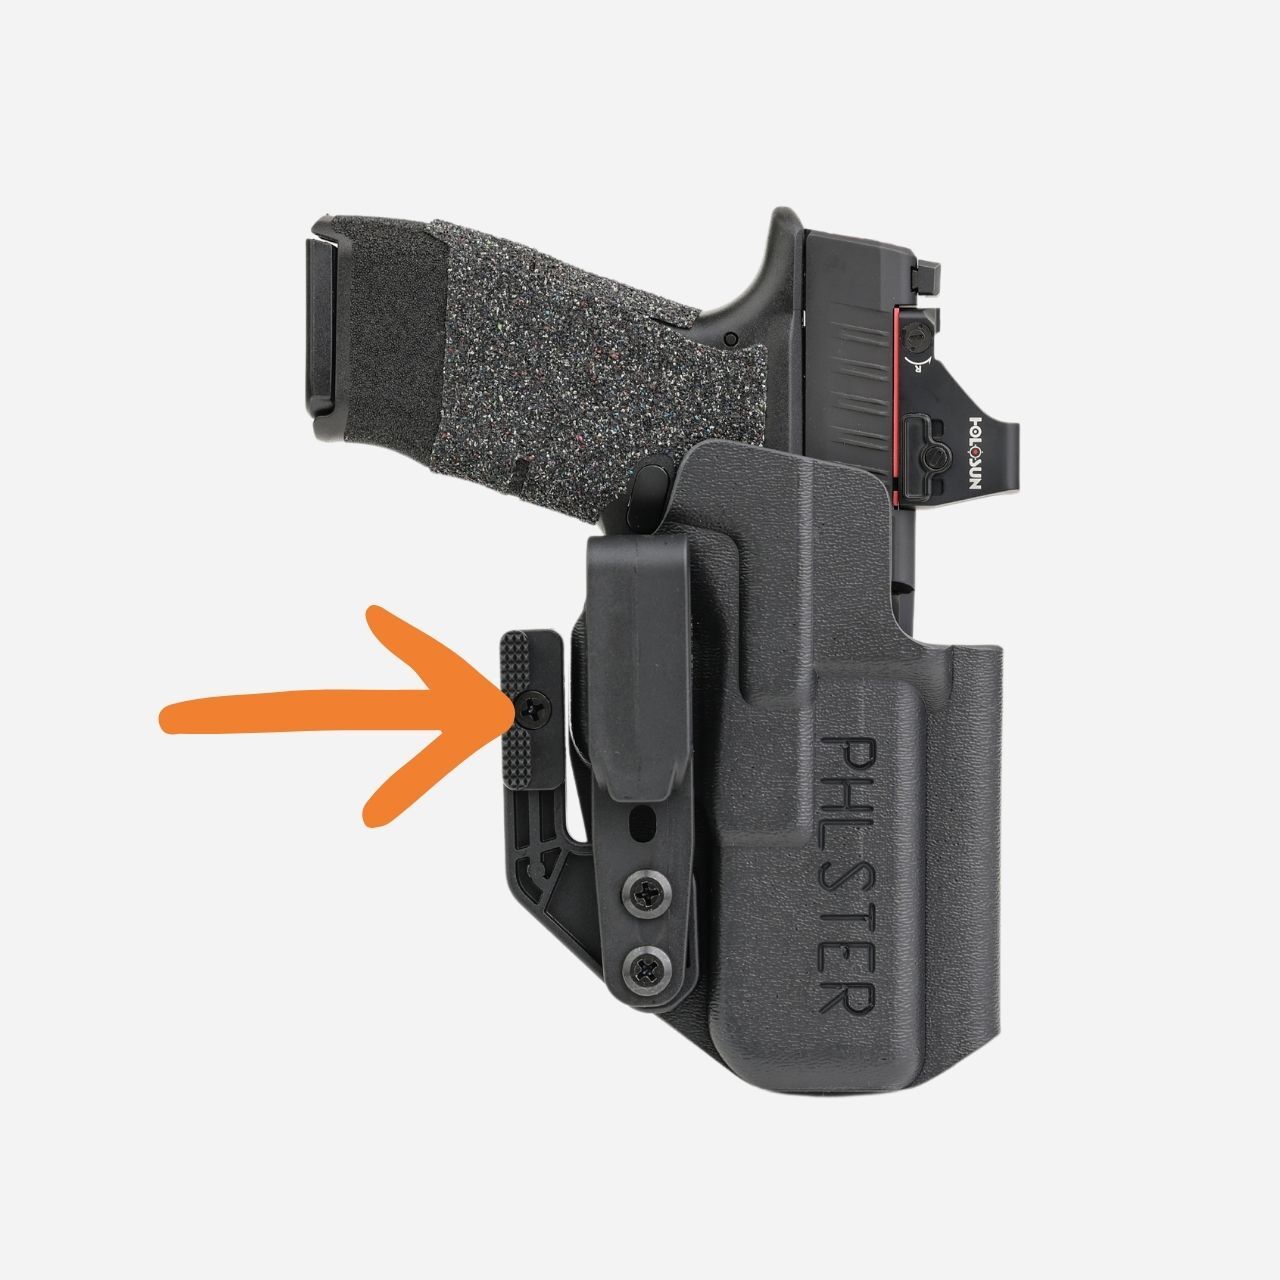
Holster wings convert belt pressure into grip rotation (see how in the Poke and Check video above). A wing is basically a lever that attaches to your holster, and it helps your grip to rotate closer to your body, which reduces grip printing. You'll hear them called wings, concealment wings, claws, concealment claws, or other creative names that holster manufacturers sometimes make up out of thin air. Not all wings are created equal, and some have varying levels of effectiveness and durability, but they all do the same basic task: rotating the grip inward.
While there are many different types of wings, by far the most popular is called the Modwing. Designed by Andrew Henry, the Modwing is adjustable for three levels of grip rotation, and it is ambidextrous for right- and left-handed holsters. Other popular wings include the Darkwing and the Ravenwing (RCS).
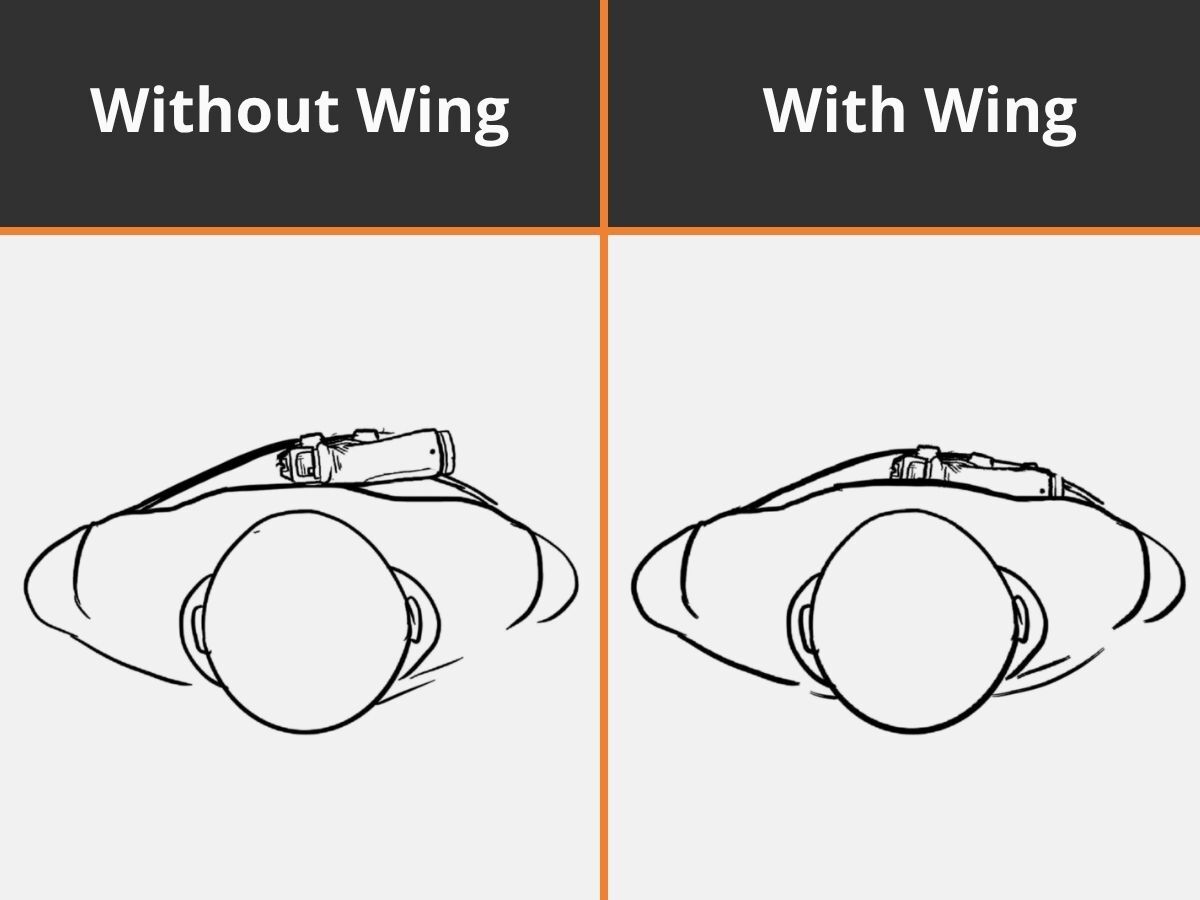
Some holster companies accomplish grip rotation with raised areas on the holster itself, either molded into the Kydex, or attached as separate inserts. While not technically considered wings, these features serve the same purpose, and can be equally effective when properly designed. When you tighten your belt over these features, the belt pressure causes the gun to rotate inward, much like a wing.
Note: if you are already using the tallest wing insert and you still need more grip rotation, use a wedge to help support the wing.
Holster Wedges
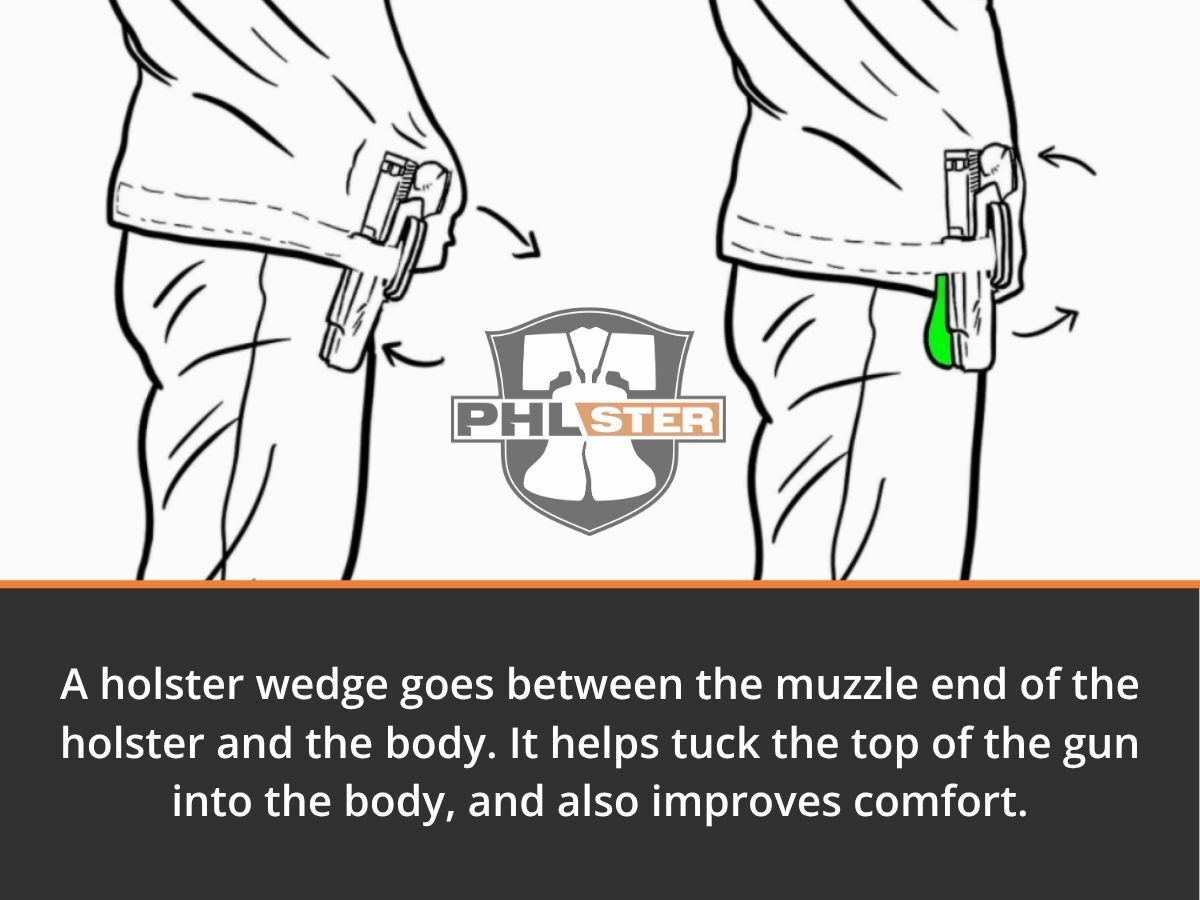
A holster wedge goes under the muzzle of your gun, and it helps tilt the top of the gun toward your body, increasing grip tuck, and decreasing printing. The placement of your wedge really matters! In addition to the basic grip tuck effect, you can also shape your holster wedge to improve grip rotation, reduce optic printing, add extra keel, or solve a number of other common concealed carry problems. For a deep dive on holster wedges, read our detailed holster wedge article, or watch the Holster Wedge Master Class video below.
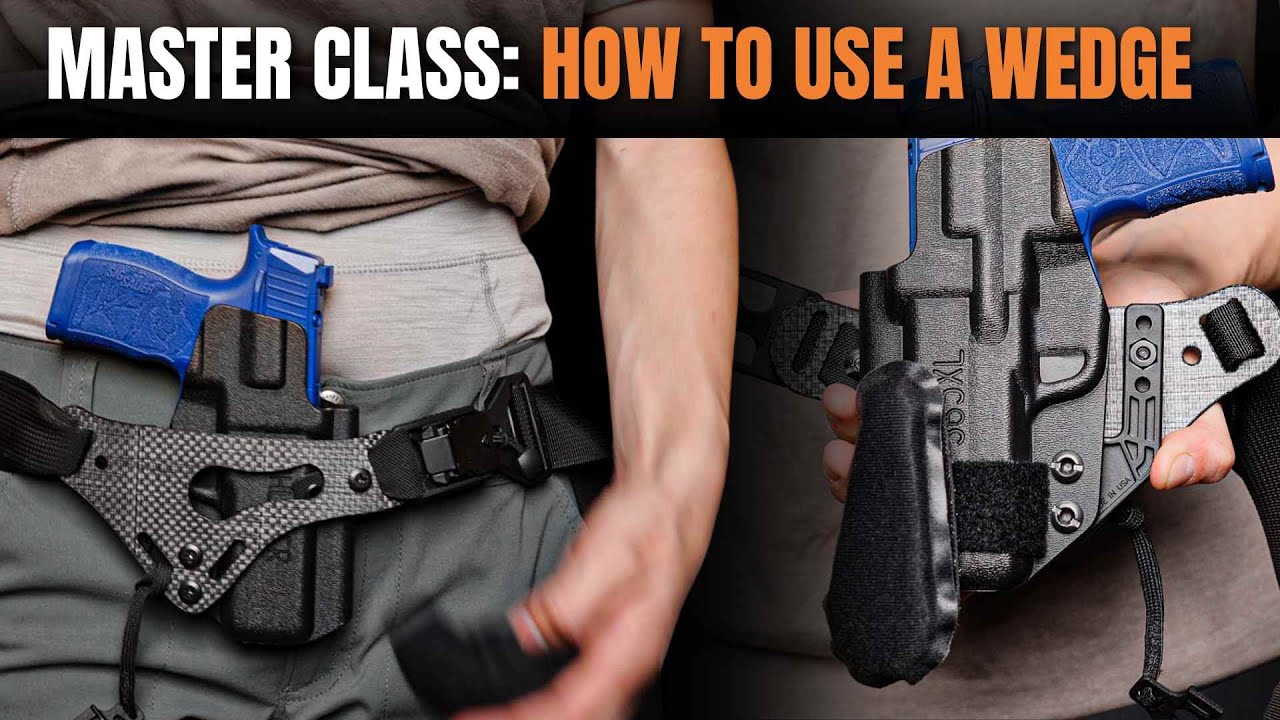
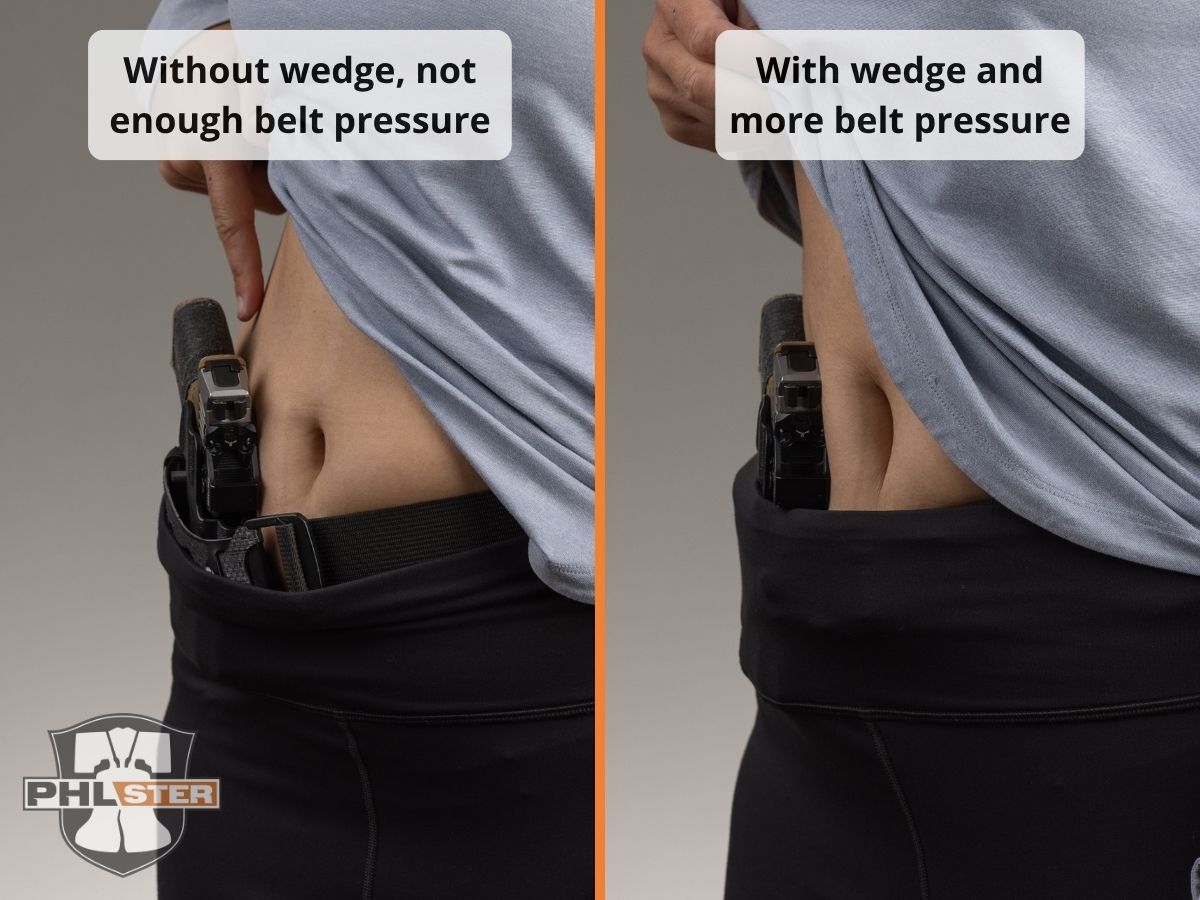
For many people, a holster wedge also solves one of the most common appendix carry comfort problems - the muzzle poking in and creating a painful pressure point. When you add a wedge to your holster, not only do you cushion the bottom of the muzzle, you also cause the gun to lay flatter against your body at the bottom, which reduces pressure points and leads to a much more comfortable experience.
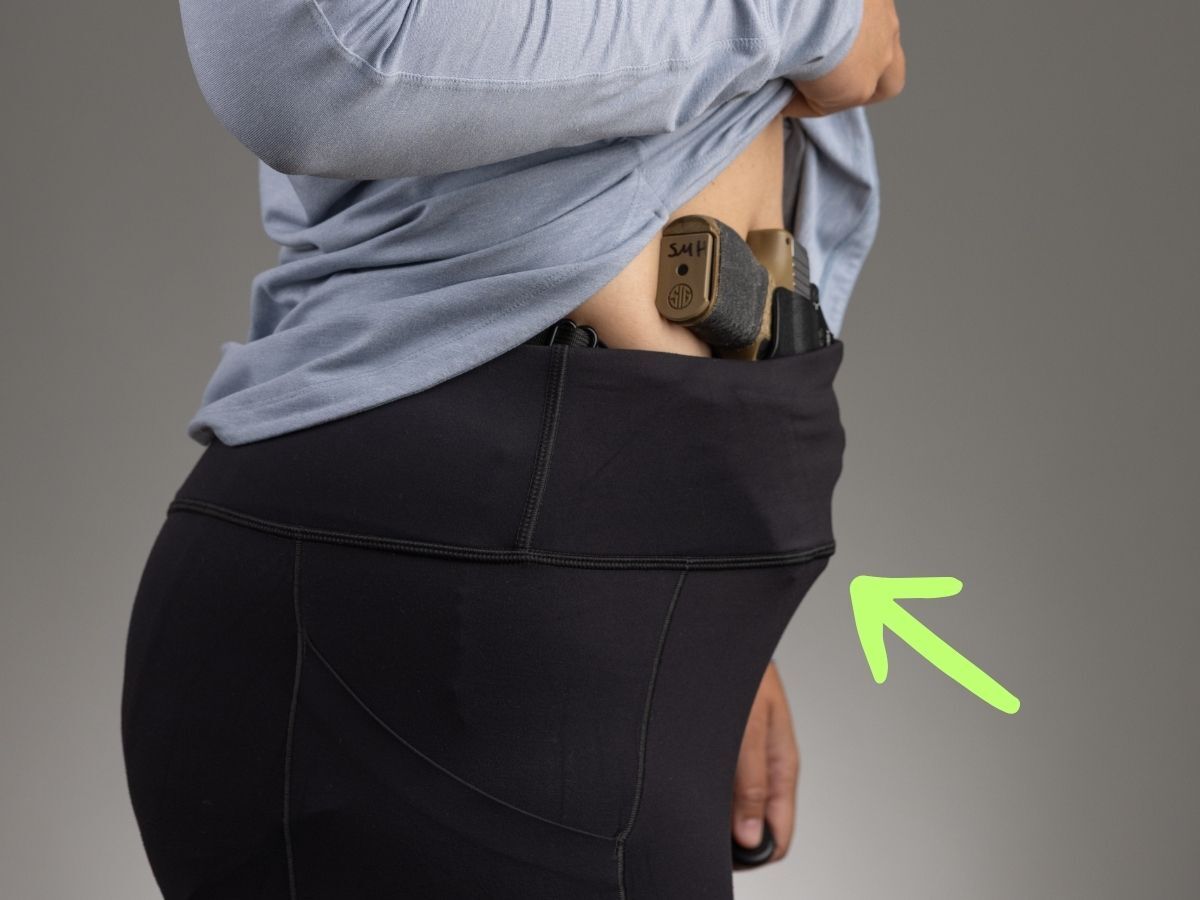
In the photo below, note how the bottom corner of the muzzle digs into the model's pelvis. This will create a painful hotspot over time. In the wedge photo, you can see that this pressure point is eliminated because the muzzle of the gun is no longer angled into her. Adding the wedge improved both her comfort and concealment. This is especially important for bigger people. Dad bods, mom bods, and folks who have a gut will especially benefit from holster wedges.
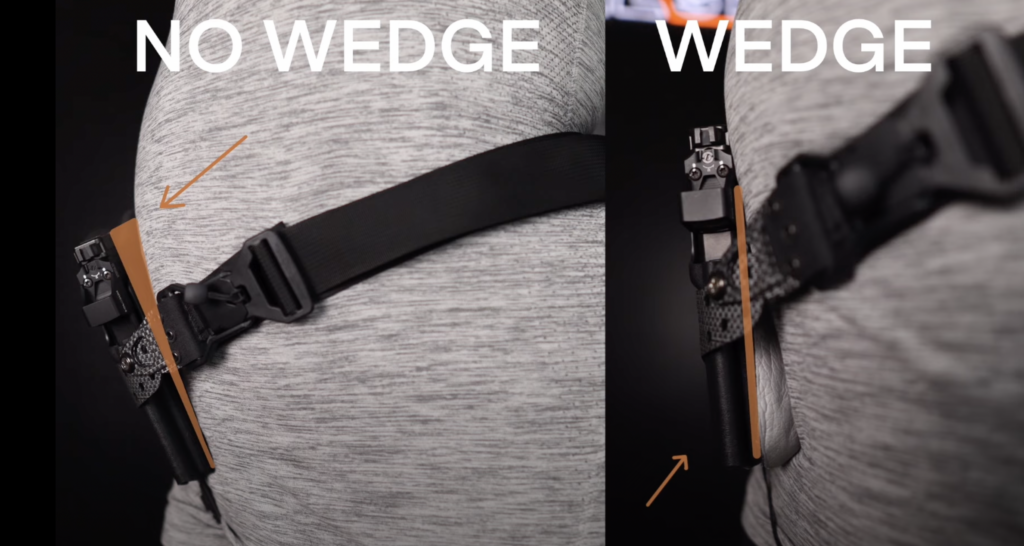
As you experiment with poke and check, you'll notice that every action has an equal and opposite reaction. For example, if you add too much wedge, you'll start to get printing below the belt line, aka the dreaded "gun dick." We've got solutions for below the belt printing in our detailed article.
Belt Pressure
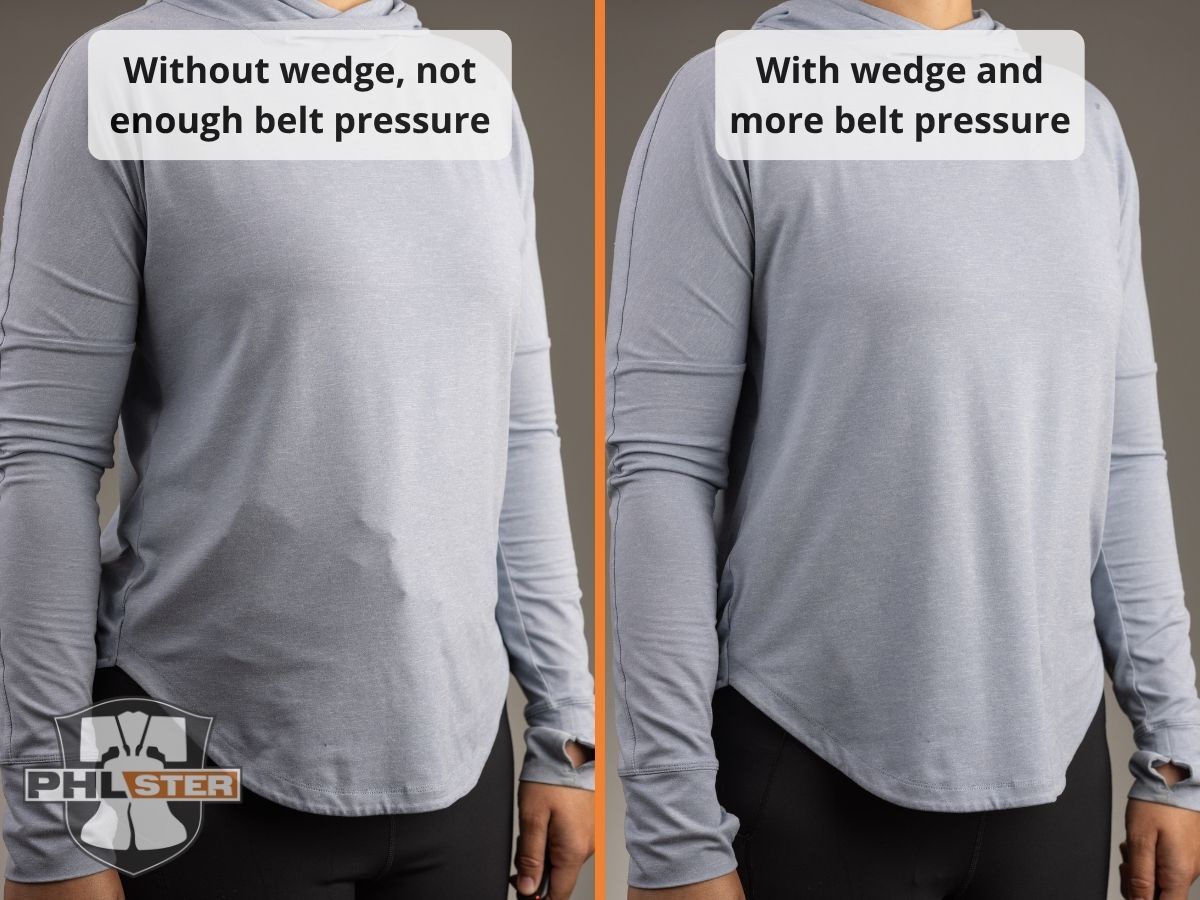
Belt pressure is the foundation of most of the Concealment Mechanics. A holster won't just magically conform to you and stay in place securely on its own. If you want it to hug tightly to your body for good concealment, it must have force applied to the outside of the holster. This force acts on the holster's concealment features (such as wings and wedges) in order to press the holster into you.
This is why so many people struggle to get good concealment with soft-sided holsters like bellybands, concealment leggings, and other concealment garments. Stretchy elastic may put pressure over the gun, but the lack of structure doesn't allow you fine control over the tilt and rotation of the holster.
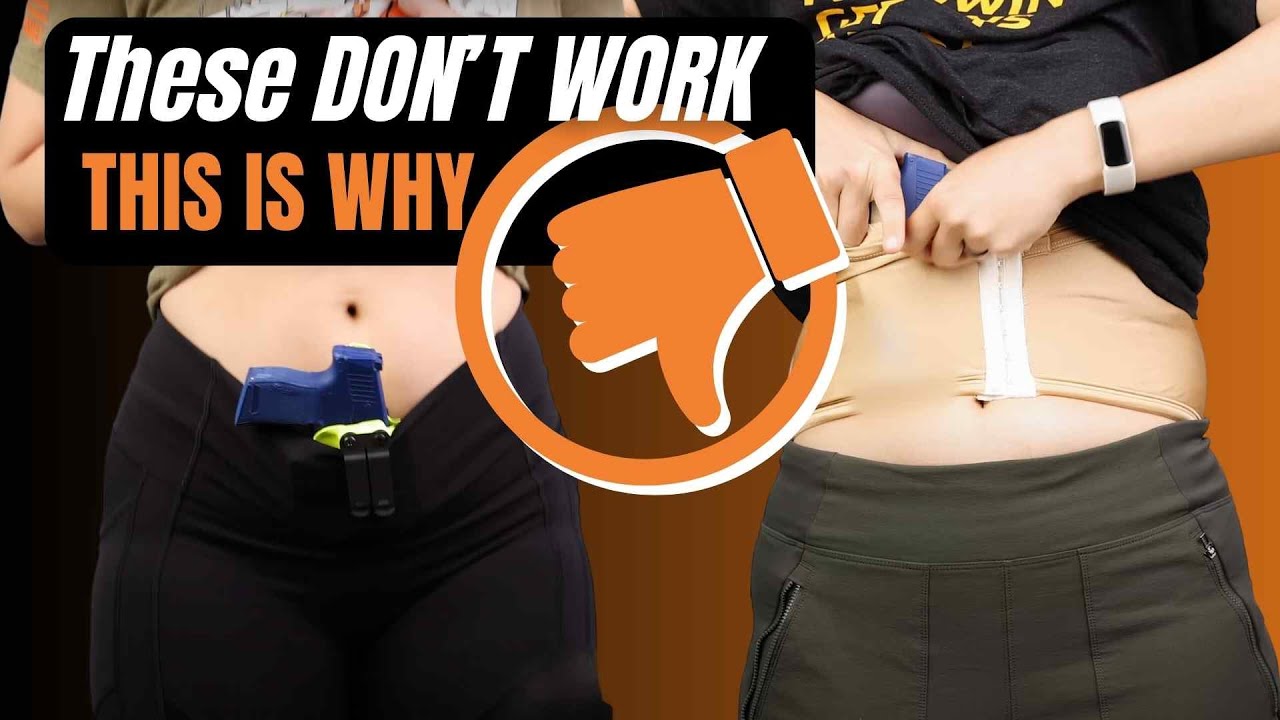
The lack of structured pressure is also why holsters that clip to your clothing without a belt, such as Ulticlips and Fabriclips, don't conceal as well as they could. Clothing isn't designed to support a gun, and while you can certainly build concealment features into a beltless holster, they won't work very well without a belt. For example, if you try clipping a Kydex holster with an Ulticlip to your jeans or leggings, you may find that instead of rotating the grip in, the wing merely pushes your pants out, and the gun continues to print.
As with most things about concealed carry, there are tradeoffs. Belt pressure is what gives you good concealment, but it can also cause muffin top. So it's worth reviewing all the Concealment Mechanics to make sure you're getting the best possible combination of features for your body shape. Getting your setup fully optimized will help reduce muffin top.
Putting It All Together
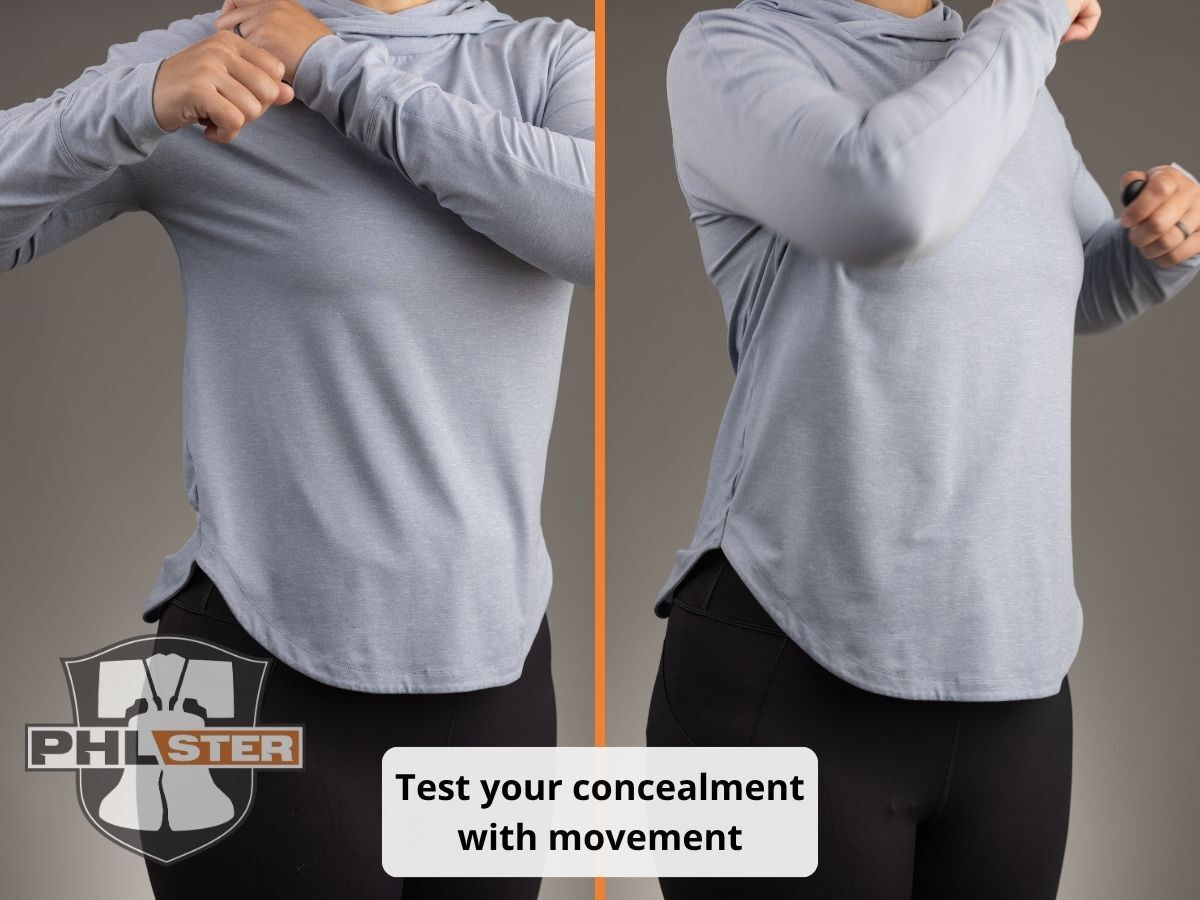
Wings, wedges, and belt pressure all work together to help you get good concealment. You'll notice that as you change one factor, other things may change, too. That's okay! You now have a full set of tools to reposition, diagnose, and correct your concealment whenever you need to.
As you work through the process, it's TOTALLY NORMAL to take a few cycles to get things dialed in. For example, when you start applying your corrections, you may realize that your Sweet Spot was a little bit off. No big deal! Just reposition the gun, diagnose any new printing, and make new corrections.
Spend some time wearing your gun around the house before going out in public. Practice bending, sitting, reaching, and other movements. It's normal to need to adjust your carry position and corrections over time, as you work out what your body needs. And things are always a little different in motion than they are standing in front of a mirror. Our next chapter on comfort will help you work out any comfort problems.
As you practice your new skills, give yourself time and grace to figure things out, and remember, we're always here to help!
Still stuck? We can help. Tried everything and still can't get your gun to conceal? Here are some resources.
Join the community
Chat with people like you in the PHLster Concealment Workshop. See pictures, ask questions, and get advice from others with similar struggles. You do NOT need to own PHLster products to participate.
Join our free Enigma Tuneup zoom class
Get live video coaching from our experts. Sign up for a Tuneup session. Note: The Enigma Tuneup class is specific to the PHLster Enigma. Anyone can join the class as a viewer and watch for free, but participation requires a correctly assembled Enigma.
Ask Phil
Phil is our digital librarian. Hooked up to all our best concealment information, he can help you find articles and videos that may relate to your problem. Ask Phil a question.
Contact support
We're always happy to answer questions! Contact us.