Light Bearing Enigma: How do I use it?
- Jan 18th 2022
- By
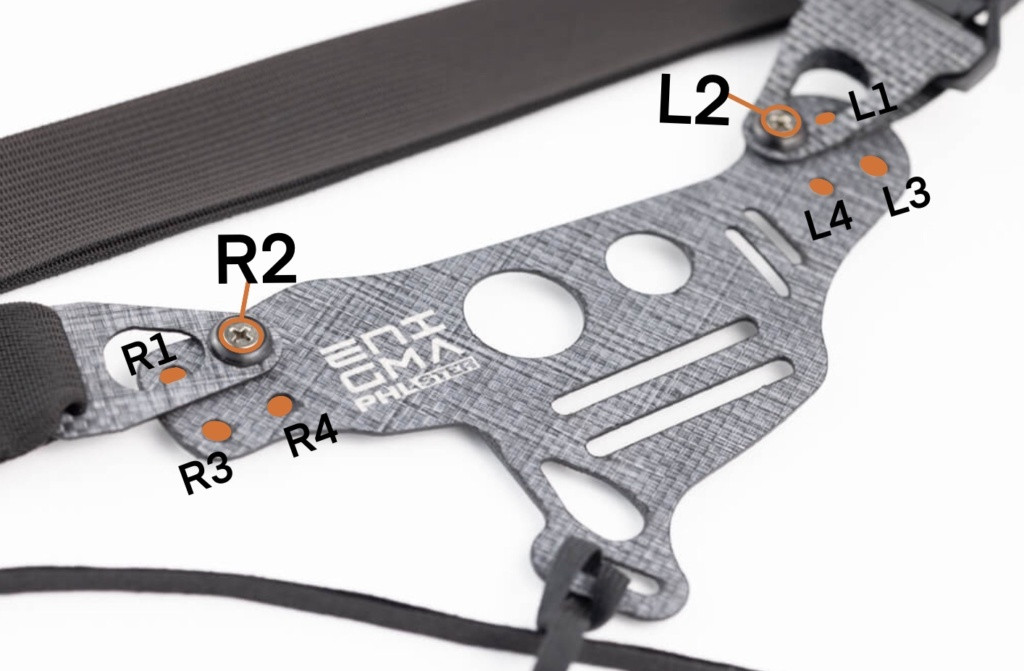
The LBE comes to you in pieces so that you can customize your perfect fit. Once you have attached Enigma’s faceplate to the face of your holster using the four screw attachments, you can start trying 2 of the 8 adjustment holes.

We encourage new Enigma users to start with R2 and L2. From there you will want to make your custom adjustments.
Next, you will want to determine what ride height and gun placement is best for you. You can do this by moving your unloaded gun in its holster around on your stomach. The goal with placement is to find the balance between comfort, mobility, and concealment. Everyone’s body has natural peaks and valleys. Try to avoid putting your gun on a peak, and instead focus on putting it in a valley. Check out our blog post on Concealment Mechanics to learn more about finding your concealment sweet spot.
Next, you will want to use the poke and check method to help determine whether or not you need If you need to make further faceplate adjustments. If you discover that you need the top of your gun to tuck more, you’ll want to use the top row of holes. If you need more grip tuck, use a larger wing insert and/or use the holes closest to the grip of your gun. For right handed users, this will be R2 or R4, for left handed users, L2 or L4.