Concealment Tuneup
- Mar 19th 2022
- By Sarah
2022 Version

This page accompanies the PHLster Holsters Concealment Tuneup class. Follow along with the class presentation, or refer back to this page as a memory aid and resource. While this page is public, it’s not really designed for standalone teaching, so if you’d like to share this information with your friends and students who aren’t at class, please link them to the Basics of Concealment Mechanics page or the Concealment Mechanics section of our YouTube channel instead.
You can also download a PDF version of the Concealment Mechanics here. You are free to use this in your own classes and distribute it to your students – please credit PHLster Holsters.
Thank you!
Overview

Photo by Tamara Keel.
About the Presenters
Jon and Sarah Hauptman, owners of PHLster holsters.
In addition to making cutting edge concealment gear, Jon and Sarah have helped thousands of people to improve their concealment. They share the lessons they’ve learned in their Concealment Tuneup class, as well as on their website, in the PHLster Concealment Workshop facebook group, on Instagram, and on their YouTube channel.

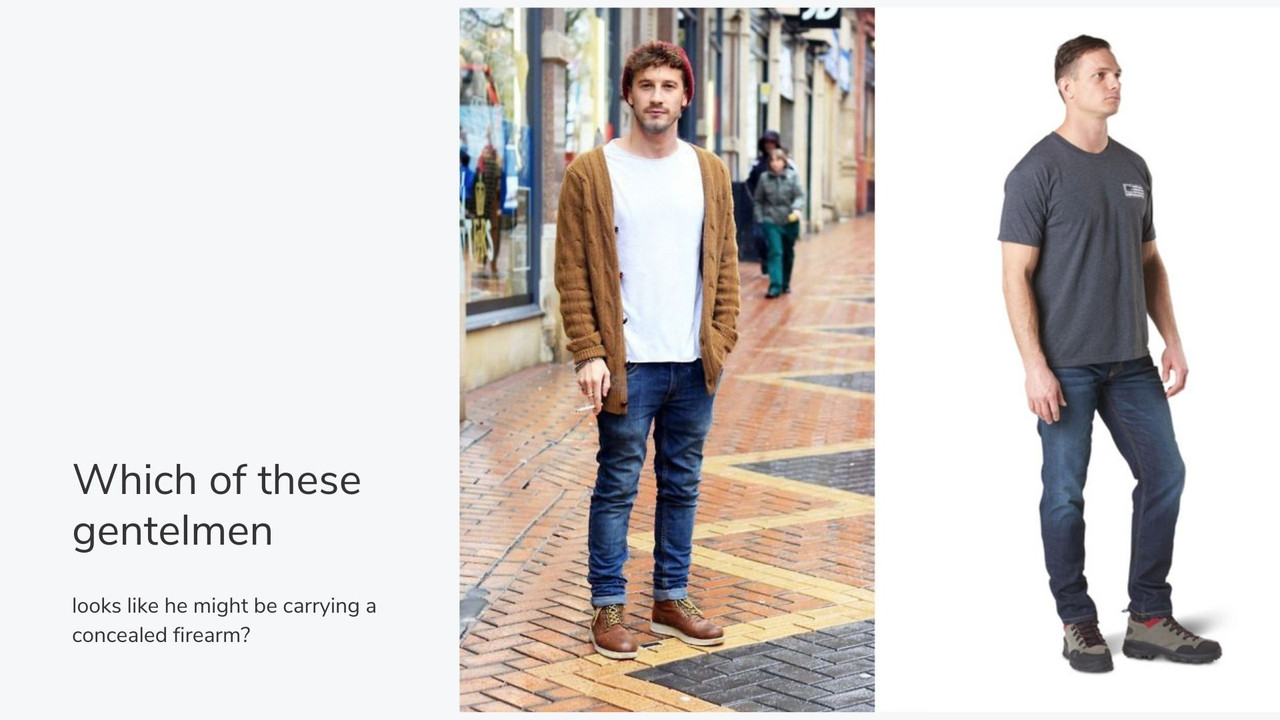
1. Why Conceal?
Assuming you’ve already made the choice to take on the responsibility of owning and carrying a firearm, why choose concealed carry? What advantages does effective concealment buy you, a regular person, in terms of carrying a gun?
Teaching points: Help your students articulate their concerns and make good decisions about their personal risk levels and concealment context.
- Target Selection
- Who notices you printing?
- Criminals, busybodies
- People may notice but not say anything to you directly
- In the news: Felony charges for gun owner after a teacher spotted her printing
- If you’re detectable, you’re selectable
- Is it wise to rely on the kindness of strangers?
- The type of bad person who notices you printing is a great reason to carry a gun
- Who notices you printing?
- The Element of Surprise
- Action vs reaction
- Control the timing and deployment of gun
- Time, timing, surpise, and initiative are significant advantages
- Social Friction
- While crime is relatively rare, everyday interactions also have consequences
- Impression management : good concealment means YOU control the image you project
- Initiative, timing, and control over gun-related conversations and consequences
- Does printing really matter?
- Highly contextual and individual
- Decide for yourself, not for others
- It’s normal to be self conscious at first
- The way to gain confidence is by building skill and proficiency, NOT by talking yourself into thinking it doesn’t matter

2. Defining Concealment
When talking about concealment, people often talk past each other. What exactly is concealment? How do you know if you’re concealed enough?
Teaching points: Develop a common language and shared standards for what “concealment” means.
New shooters are often self-conscious about printing. Rather than telling them “no one will notice,” teach them to have control over their concealment. Skill and control breed confidence, not platitudes.
“Getting Made”
- What do people notice?
- Pattern recognition
- Visual cues
- Movement
- Subtle differences
- Behavior
- Pattern recognition
- How do they know it’s a gun?
- Visual cues
- Context cues
- Social/cultural cues

Concealment Spectrum
- Open Carry
- Gun immediately visible
- Printing
- The difference between the angular shape of the gun and the natural shapes of the body
- When the gun disrupts your clothing
- Degrees of printing
- Covered – there’s no mistaking that it’s a gun
- Subtle – There’s a corner where there should be a curve, a lump, or a bulge. It may not obviously look like a gun, but other context cues may give hints about what it is
- Telling
- Behavior or social cues that make people more likely to think “gun” when they see something that’s not quite right
- Posture
- Style of dress
- “Team jersey”
- Behavior or social cues that make people more likely to think “gun” when they see something that’s not quite right
What do we consider “concealed?”
- Gun is undetectable by socially appropriate looking
- Requires the observer to violate social norms to detect the gun
- Staring
- Socially calibrated timer
- Inappropriate touch
- Direct questions
- Staring
- Our definition of “concealed” is that the gun is sufficiently hidden as to make detection efforts obvious
3. Holster Safety
The foundation of good concealment is the holster. Whatever else the holster does, it HAS to meet these minimum safety requirements first.
Teaching points: Help your students recognize the three elements of a safe holster, and understand why each one is important. We recommend encouraging your students to invest time learning and practicing safe reholstering techniques as a separate, distinct, and important foundation skill.

Safe Holster Requirements
- Full trigger protection
- Rigid enough that the trigger CANNOT be manipulated from the outside
- Retention through a FULL range of motion
- Retain the gun in the holster
- Retain the holster in a consistent position on the body
- Safe reholstering
- MUST be able to reholster without sweeping any part of the body
- A safe mechanism for one-handed reholstering is STRONGLY recommended – the best way to accomplish this is with an unobstructed, rigid mouth
- https://youtu.be/JGU7HbgDIvE

4. Carry Positions
The most practical and popular method of carrying a concealed firearm is inside the waistband, or IWB. The carry positions are described using clock face positions as a reference. 12:00 is directly in front of you, and 6:00 is behind.
Note that your choice of carry position can increase or decrease your risk of detection.
Most prevalent carry positions:
- Behind the hip
- From 3:00 to 5:00 for a right handed shooter, but never over the spine
- Gun nearer to 3:00 is also called strong side
- Appendix carry
- Also called AIWB (appendix inside waistband)
- Gun is placed on the front of the body, usually somewhere between the points of the hips
- Does not necessarily mean the gun is dead center at 12:00
Note: Friends don’t let friends carry small-of-back. It provides the least efficient access to the pistol, and presents substantial safety risks to the spine. We do not recommend this practice.
Appendix Carry

5. Concealment Mechanics
These basic first steps are a starting point for maximizing your concealment potential. While all bodies are different, the process is the same for everyone.
Teaching points: Everyone wants to feel unique and special. But don’t let your students fall into the trap of thinking the guidelines don’t apply to them because they’re shaped like ________. They will use some variation of these steps for any IWB concealment challenge, no matter how they are shaped.
Three Step Process
- Finding your “sweet spot”
- Every person has “peaks and valleys”
- Keep the gun off the peaks, and nestle it into a valley
- ALL BODIES are made up of organic curves, whether skinny, fat, or anywhere in between
- Getting enough grip rotation
- Converting belt pressure to grip rotation
- Getting enough grip tuck
- Converting belt pressure to grip tuck
Use the Poke and Check method to self-assess and fine-tune your concealment.
Appendix Carry


Sweet Spot - Peaks and Valleys
A person’s sweet spot is highly individual, and is based on size, body shape, and clothing drape.
Teaching points: Often, students will say, “I don’t have a sweet spot. I’m too fat/thin/round/square etc.” This is not true. Everyone has some areas of the body which are better than others for concealment. Help your students understand that concealment is a skill and a process.
Peaks and Valleys

Finding your Concealment Sweet Spot
- First, find your boundaries for full range of motion
- Ride height vs centering
- Next, make note of your peaks and valleys
- All bodies are made up of organic curves
- Curves are complex
- When looking for your sweet spot, look for an area that is relatively flatter than the curves around it – it doesn’t have to be perfectly flat to be usable
- Take areas of clothing drape into consideration
- This is a process of self-assessment and experimentation
Grip Rotation
The goal is to cause the grip of the gun to rotate toward the body, so the entire gun lays flat in the sweet spot. To accomplish this, we take belt pressure and convert it to grip rotation with different holster concealment features.
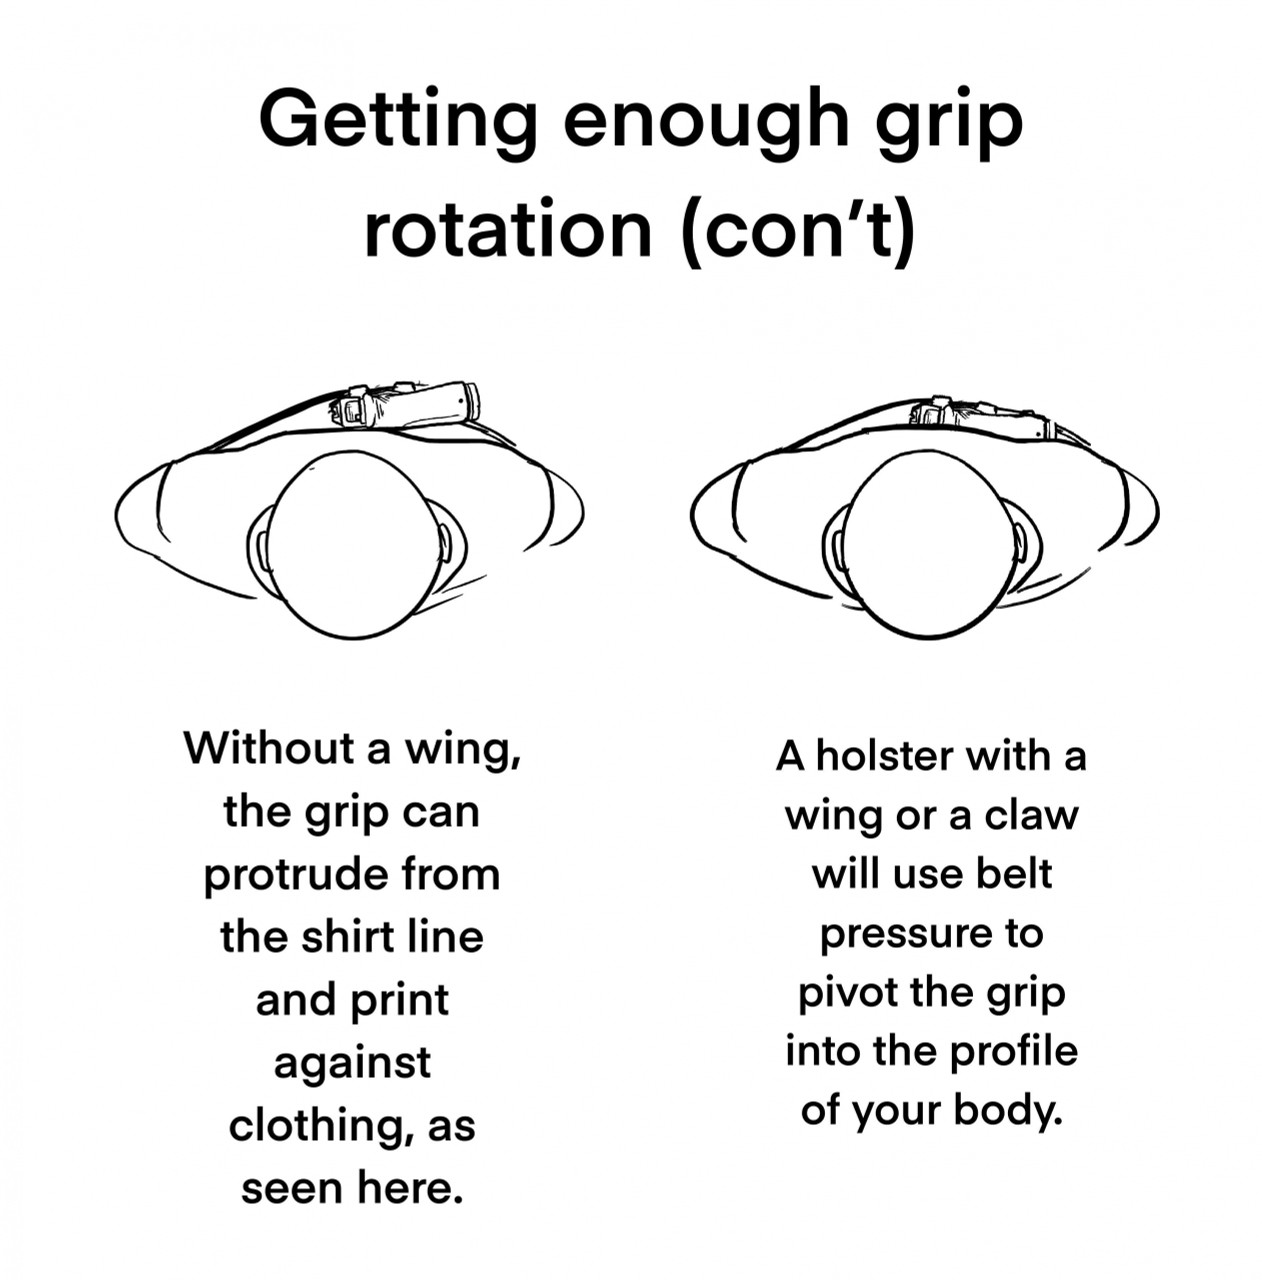
Mechanisms for Achieving Grip Rotation
- Asymmetry
- Holster wings
- Wedges
Grip Tuck
The goal is to tuck the top half of the gun in toward the body, minimizing the differential between the gun and the body.
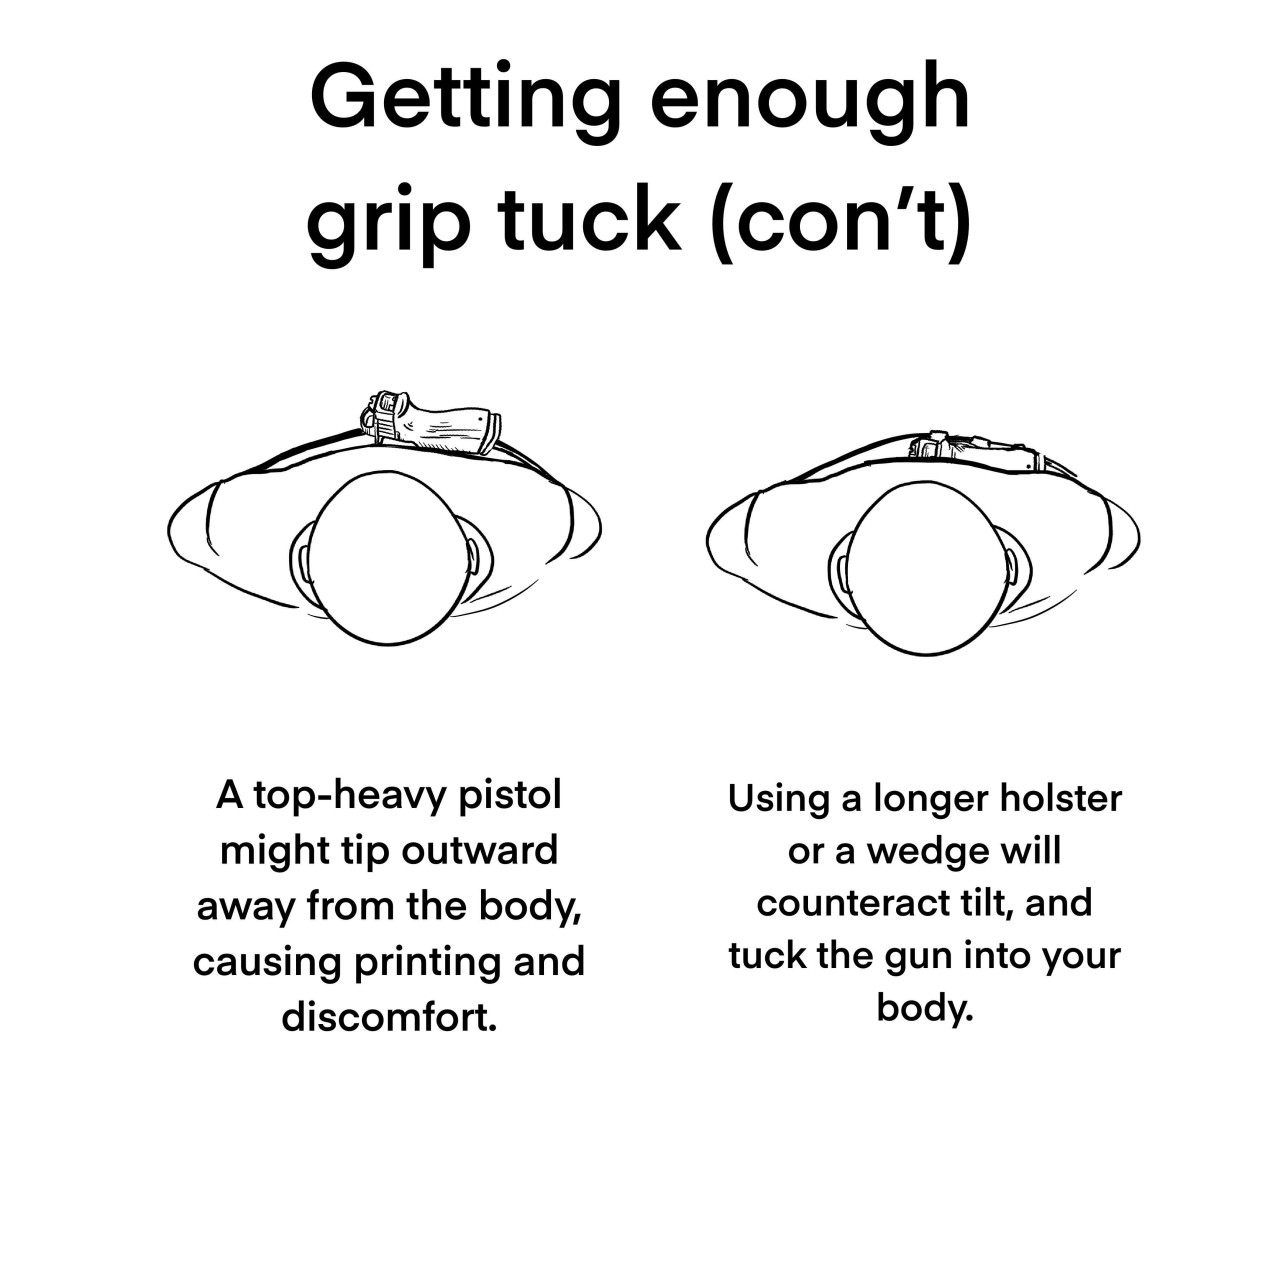
Mechanisms for Achieving Grip Tuck
- Wedges
- Longer holsters
The mass of the gun above the belt vs. the mass of the gun below the belt.

Mechanisms for Changing Keel
- Longer holsters
- Wedges
- Different wedge placement gives you different effects
- overhang
- grip bias
- slide bias
- Different wedge placement gives you different effects
- Raising the “waterline,” or belt line
- Can affect grip access
For a full video series lesson on the three steps to concealment, wings, wedges, poke and check, and the Keel Principle, see our Basic Concealment Mechanics page.

6. Foundation Principles of Comfort
Carrying a gun is never going to be as comfortable as not carrying one. But how much discomfort should you tolerate?
Teaching points: Help your students learn to identify the signs of a legitimate problem, vs when to “just get used to it.” Discuss tools and skills for improving comfort.
- Discomfort is one of the most common reasons people give up on carrying
- Saying, “I’m uncomfortable” is about as useful as going to the doctor and saying, “I’m sick.”
- Learn to identify symptoms and root causes of discomfort
- Ask WHAT WHAT WHAT WHEN?
- WHAT part of the gun or holster?
- WHAT is it doing?
- To WHAT part of the body?
- WHEN does it happen?
- Sample vocabulary: poking, pinching, rubbing, pressure points? Sitting, standing or moving? Does it happen right away, or at the end of a long day? EXACTLY what part of the gun or holster – is it the muzzle, the grip, the sweat guard? Be as specific as possible
Discomfort vs Pain
- Discomfort
- Annoying, uneasy
- Can be physical or psychological
- Results in avoidance
- Gets better when you’re not focusing on it
- You can get used to it
- Pain
- Warning of actual or potential tissue damage
- Doesn’t go away when you’re not focusing on it
- Fails to improve or gets worse over time
- LISTEN to it, don’t ignore it
- Most healthy people will stop carrying before damaging themselves (although neither is a good outcome)
- Both pain and discomfort are personal and subjective
- Ask, don’t tell
- “Carrying should be comforting, not comfortable.”
- PLEASE STOP SAYING THIS.
- Discover the root cause of the discomfort, and empower the person to control it – just like printing.
Root Causes of Discomfort
- Pressure points
- Areas of concentrated pressure can cause pain, skin damage, and pressure ulcers over time
- Friction
- Excessive movement of the gun relative to the surface of the skin
- Imagine rug burn
- Skin shear
- Movement of the bottom layers of the skin relative to the top layers
- Imagine going down a metal slide in shorts
- Skin microclimate
- Placing solid objects on the body prevents heat loss and moisture evaporation
- Chronically damp conditions can affect skin integrity, making skin more vulnerable to injury
- Imbalance
- Too much weight or leverage in one area of the body
- Imagine carrying a heavy gun on your ankle and running a marathon
- Posture or gait changes
Teaching points: When the root causes of discomfort aren’t resolved, the person will not carry. They may not be able to articulate why, and may come up with excuses or alternate reasons, especially if they don’t want to look weak.
Create an environment for your students where they can talk openly and frankly about their bodies and their challenges. This gives them the best chance of long term success.
Solutions to Comfort Problems
- Pressure points
- Find concealment boundaries, adjust sweet spot, and employ the Concealment Mechanics to eliminate pressure points at the root
- Do not add pads until the root cause is resolved
- Friction
- Place the gun on a low-movement area of the body
- Secure the gun with more stable belts and holsters
- Add an undergarment or liner to reduce friction and protect the skin
- Skin shear
- Secure the gun in a low-movement area
- Use inelastic (non-stretchy) ways to secure the gun
- Pay extra attention to pressure points
- Add a low friction undergarment or liner
- Use lubricants
- Reduce the weight of the gun
- Skin microclimate
- Use washable holster and wedge materials
- Use breathable liners and/or undergarments
- Use materials with natural or synthetic antimicrobial properties
- Minimize the amount of time spent carrying
- Imbalance
- Reduce the weight of the gun
- Keep the gun closer to the center of the body
- Reduce the amount of time spent carrying
- Ask a professional about exercise or physical therapy

7. Bringing It All Together
Concealment is just practical physics, and all the same rules apply. For every action, there’s an equal and opposite reaction. While there’s no free lunch when it comes to carrying a gun on the body, by understanding the forces at work, each person can reach their maximum potential.
Teaching points: Empower your students with a can-do attitude, while setting realistic expectations.


- Things that make concealment more difficult:
- Ratio between gun size and body size
- Wardrobe
- Balance
- The closer you get to your maximum concealment potential, the more you’ll notice the trade-offs between different actions
- Everything has a cost, and it gets complicated
- Priorities can vary
- Realistic expectations
- Concealment requires sacrifices
- Investing in knowledge reduces the number of sacrifices you have to make