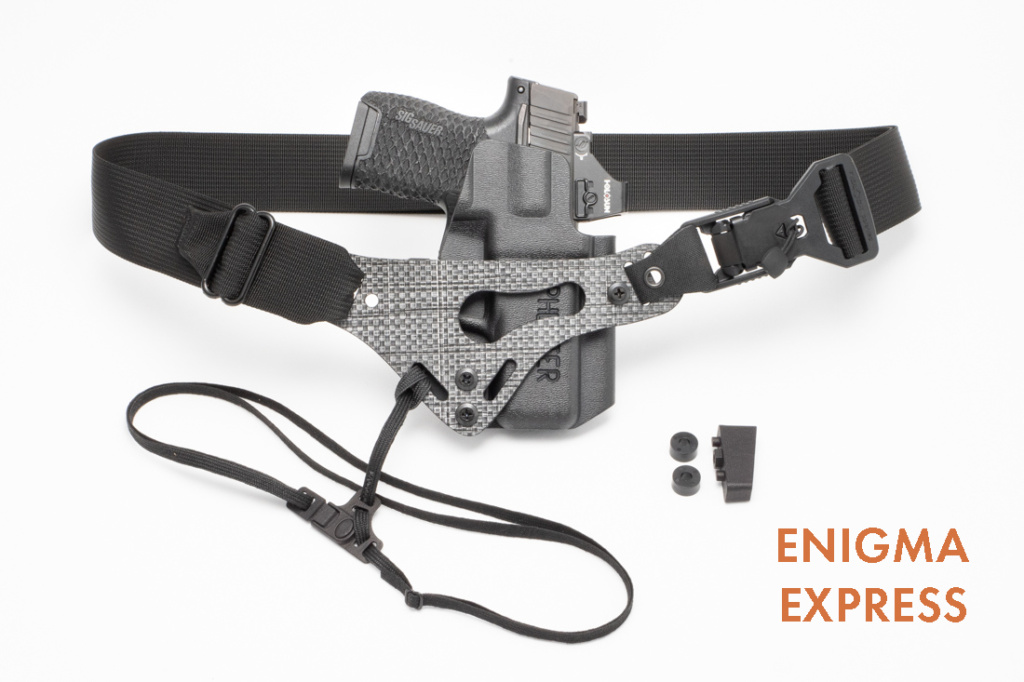
The Enigma Express is pre-assmbled and comes with our Skeleton holster (for specific gun models only – see fit list).
The Express faceplate has one big oval hole in the middle, and attaches to the holster with two screws. It’s made for a limited list of guns WITHOUT a light or laser attached. See the Express product page for specific fit information.
P365-XMacro (P365 Macro and Macro Variants are only compatible with the Macro Express)
P365-380
Springfield Hellcat
Hellcat Pro
Ruger LCR
S&W J-Frame (Does not fit the S&W Bodyguard 38)
Shield 1.0/2.0 – 3.1in
Shield Plus – 4in/3.1in
M&P 2.0 Compact 4in
Walther PDP-F 3.5in
NOTICE: Sig models with either factory or aftermarket metal frames are not compatible with the Enigma Express. Additionally, “Glock analog” pistols like P80 and Shadow Systems are not compatible with the Enigma Express.
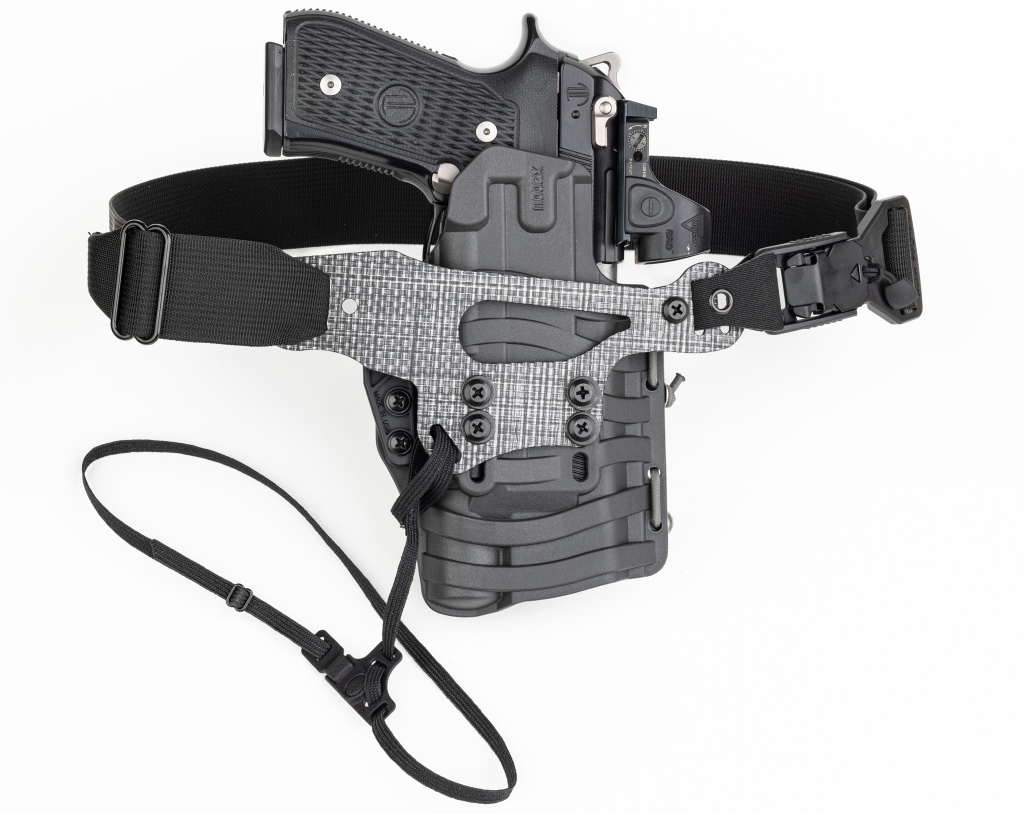
The Light Bearing Express has one large, irregular hole in the faceplate, and the holster attaches with four screws. It’s made for guns with either an X300 or TLR-1 weapon-mounted light.
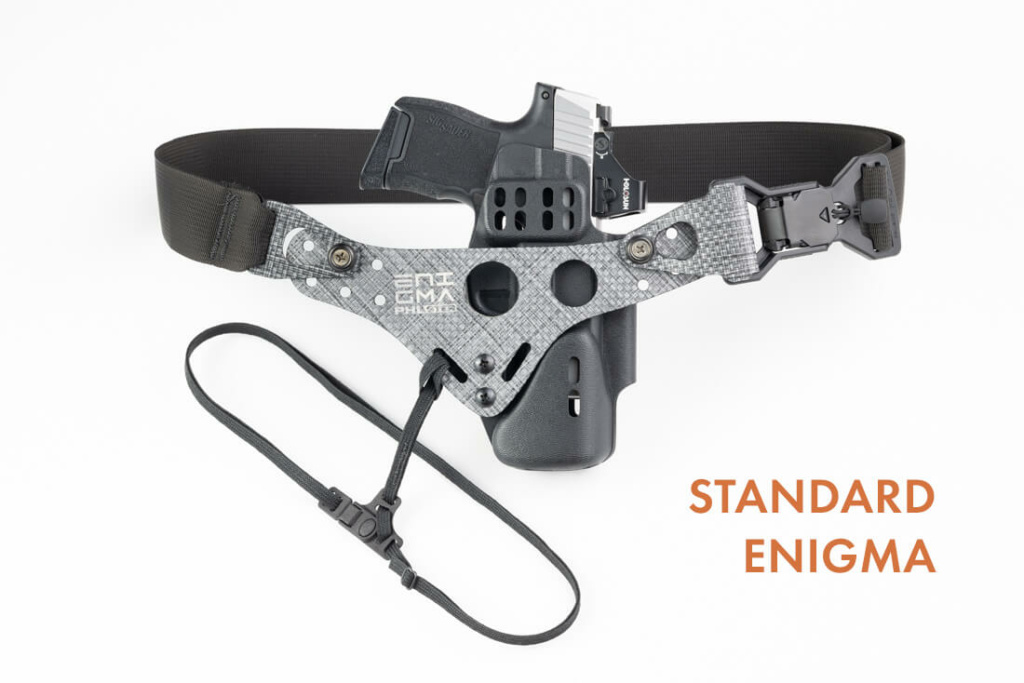
Enigma OS – Standard
The Standard Enigma OS comes disassembled and does not come with a holster shell. It is for guns without a light or laser attached.
The Standard faceplate has two large round holes in the middle, and 6 small holes on each side. It attaches to the holster through the modwing, using two screws. It’s for guns WITHOUT a light or laser attached.
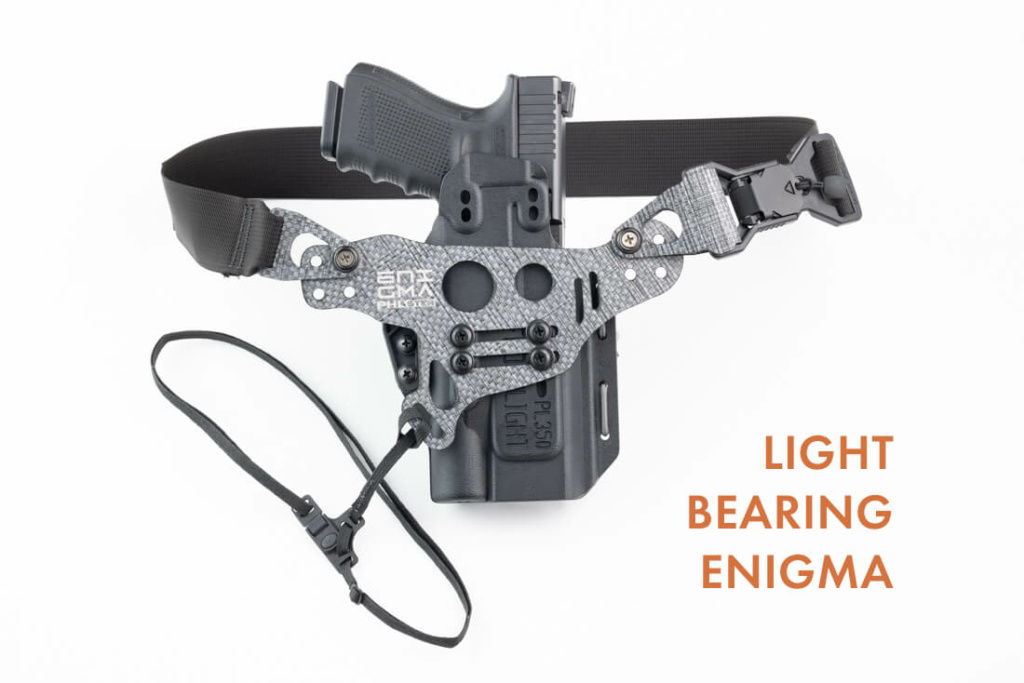
Enigma OS – Light Bearing
The Light Bearing Enigma OS comes disassembled and does not include a holster shell. It is for guns that have a light or laser attached.
The Light Bearing Enigma has two long, parallel slots in the faceplate. It attaches to the faceplate with four screws. It’s for guns with weapon mounted lights or lasers, as well as Tenicor brand holsters.
Other PHLster Products
Download the PHLster holsters and accessories manual. This PDF document includes important safety information and instructions for PHLster belt-mounted holsters, clips, soft loops, wings, attachments, and a visual guide to IWB Floodlight adjustment.
Learn to properly adjust your inside-the-waistband Floodlight2 holster. Do this first, before using it. If you are trying to troubleshoot a fitment or retention problem, reviewing this video should be your first step.
Learn to properly adjust your inside-the-waistband Floodlight holster. Do this first, before using it. If you are trying to troubleshoot a fitment or retention problem, reviewing this video should be your first step.
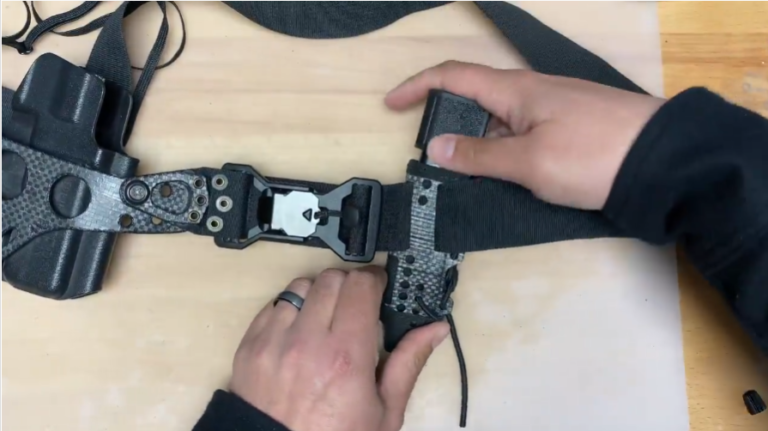
Use the video playlist below to learn how to use the soft loops that come with your Pro holster, or how to install different belt clips. Left handed users: you can use the “complete assembly” when switching your holster from right to left handed.
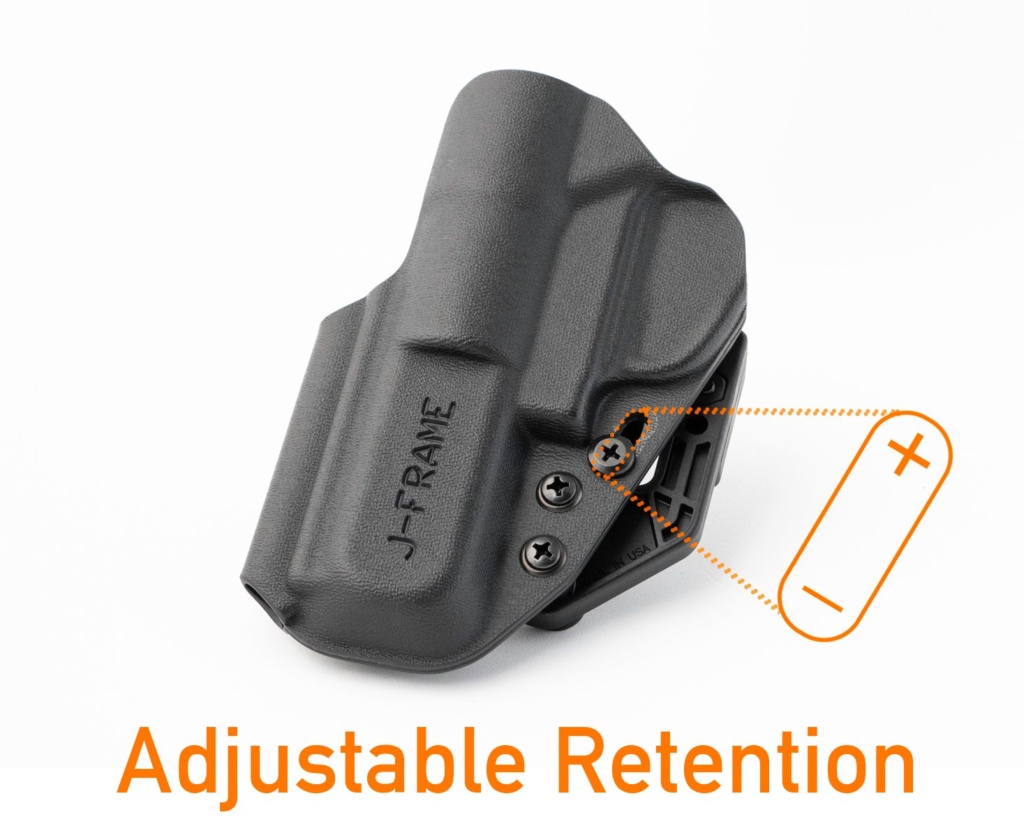
To adjust the retention on your PHLster City Special revolver holster, simply loosen the screw and slide it towards or away from the trigger guard. Moving towards the trigger guard loosens the retention, and moving away from the trigger guard tightens it.
Here’s how to change the clip that comes with your Skeleton holster for a DCC Mod4 clip. This video can also be used to reassemble your Skeleton holster if you have taken it apart.
Summit OWB Holster Instructions
Here’s how to configure and adjust your PHLster Summit OWB holster.
IWB Holster Retention Too Tight?
The PHLster Skeleton and PHLster Pro Holsters have fixed retention, and are not adjustable by the user. If your holster retention feels too tight, please watch this video. Note that aftermarket parts and modifications, including frame or trigger guard stippling, can affect your holster’s retention feel.
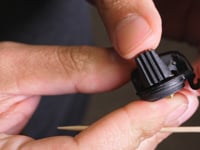
The Modlite PL350 comes with PHLster ARC switches. Use this instruction video to replace switches.
ARC Switches - X300
IMPORTANT: You install ARC switches at your own risk. GO SLOWLY, and do not force parts apart or together. Review ALL instruction material before starting.
There is some variation in the metal switch armatures in newer Surefire X300 lights. The factory switches may be difficult to remove, and the ARC switches may be difficult to install. If you encounter resistance, STOP before you break your light. Try the tricks in these videos:
How to get comfortable with your concealed carry gun and holster. Technique tips, holster comfort mods, and carry position advice for ALL body types, including how to sit with an appendix carry holster. This is not just for PHLster holsters and not just for appendix carry – you can make any brand of IWB (inside the waistband) holster more comfortable by learning these skills.
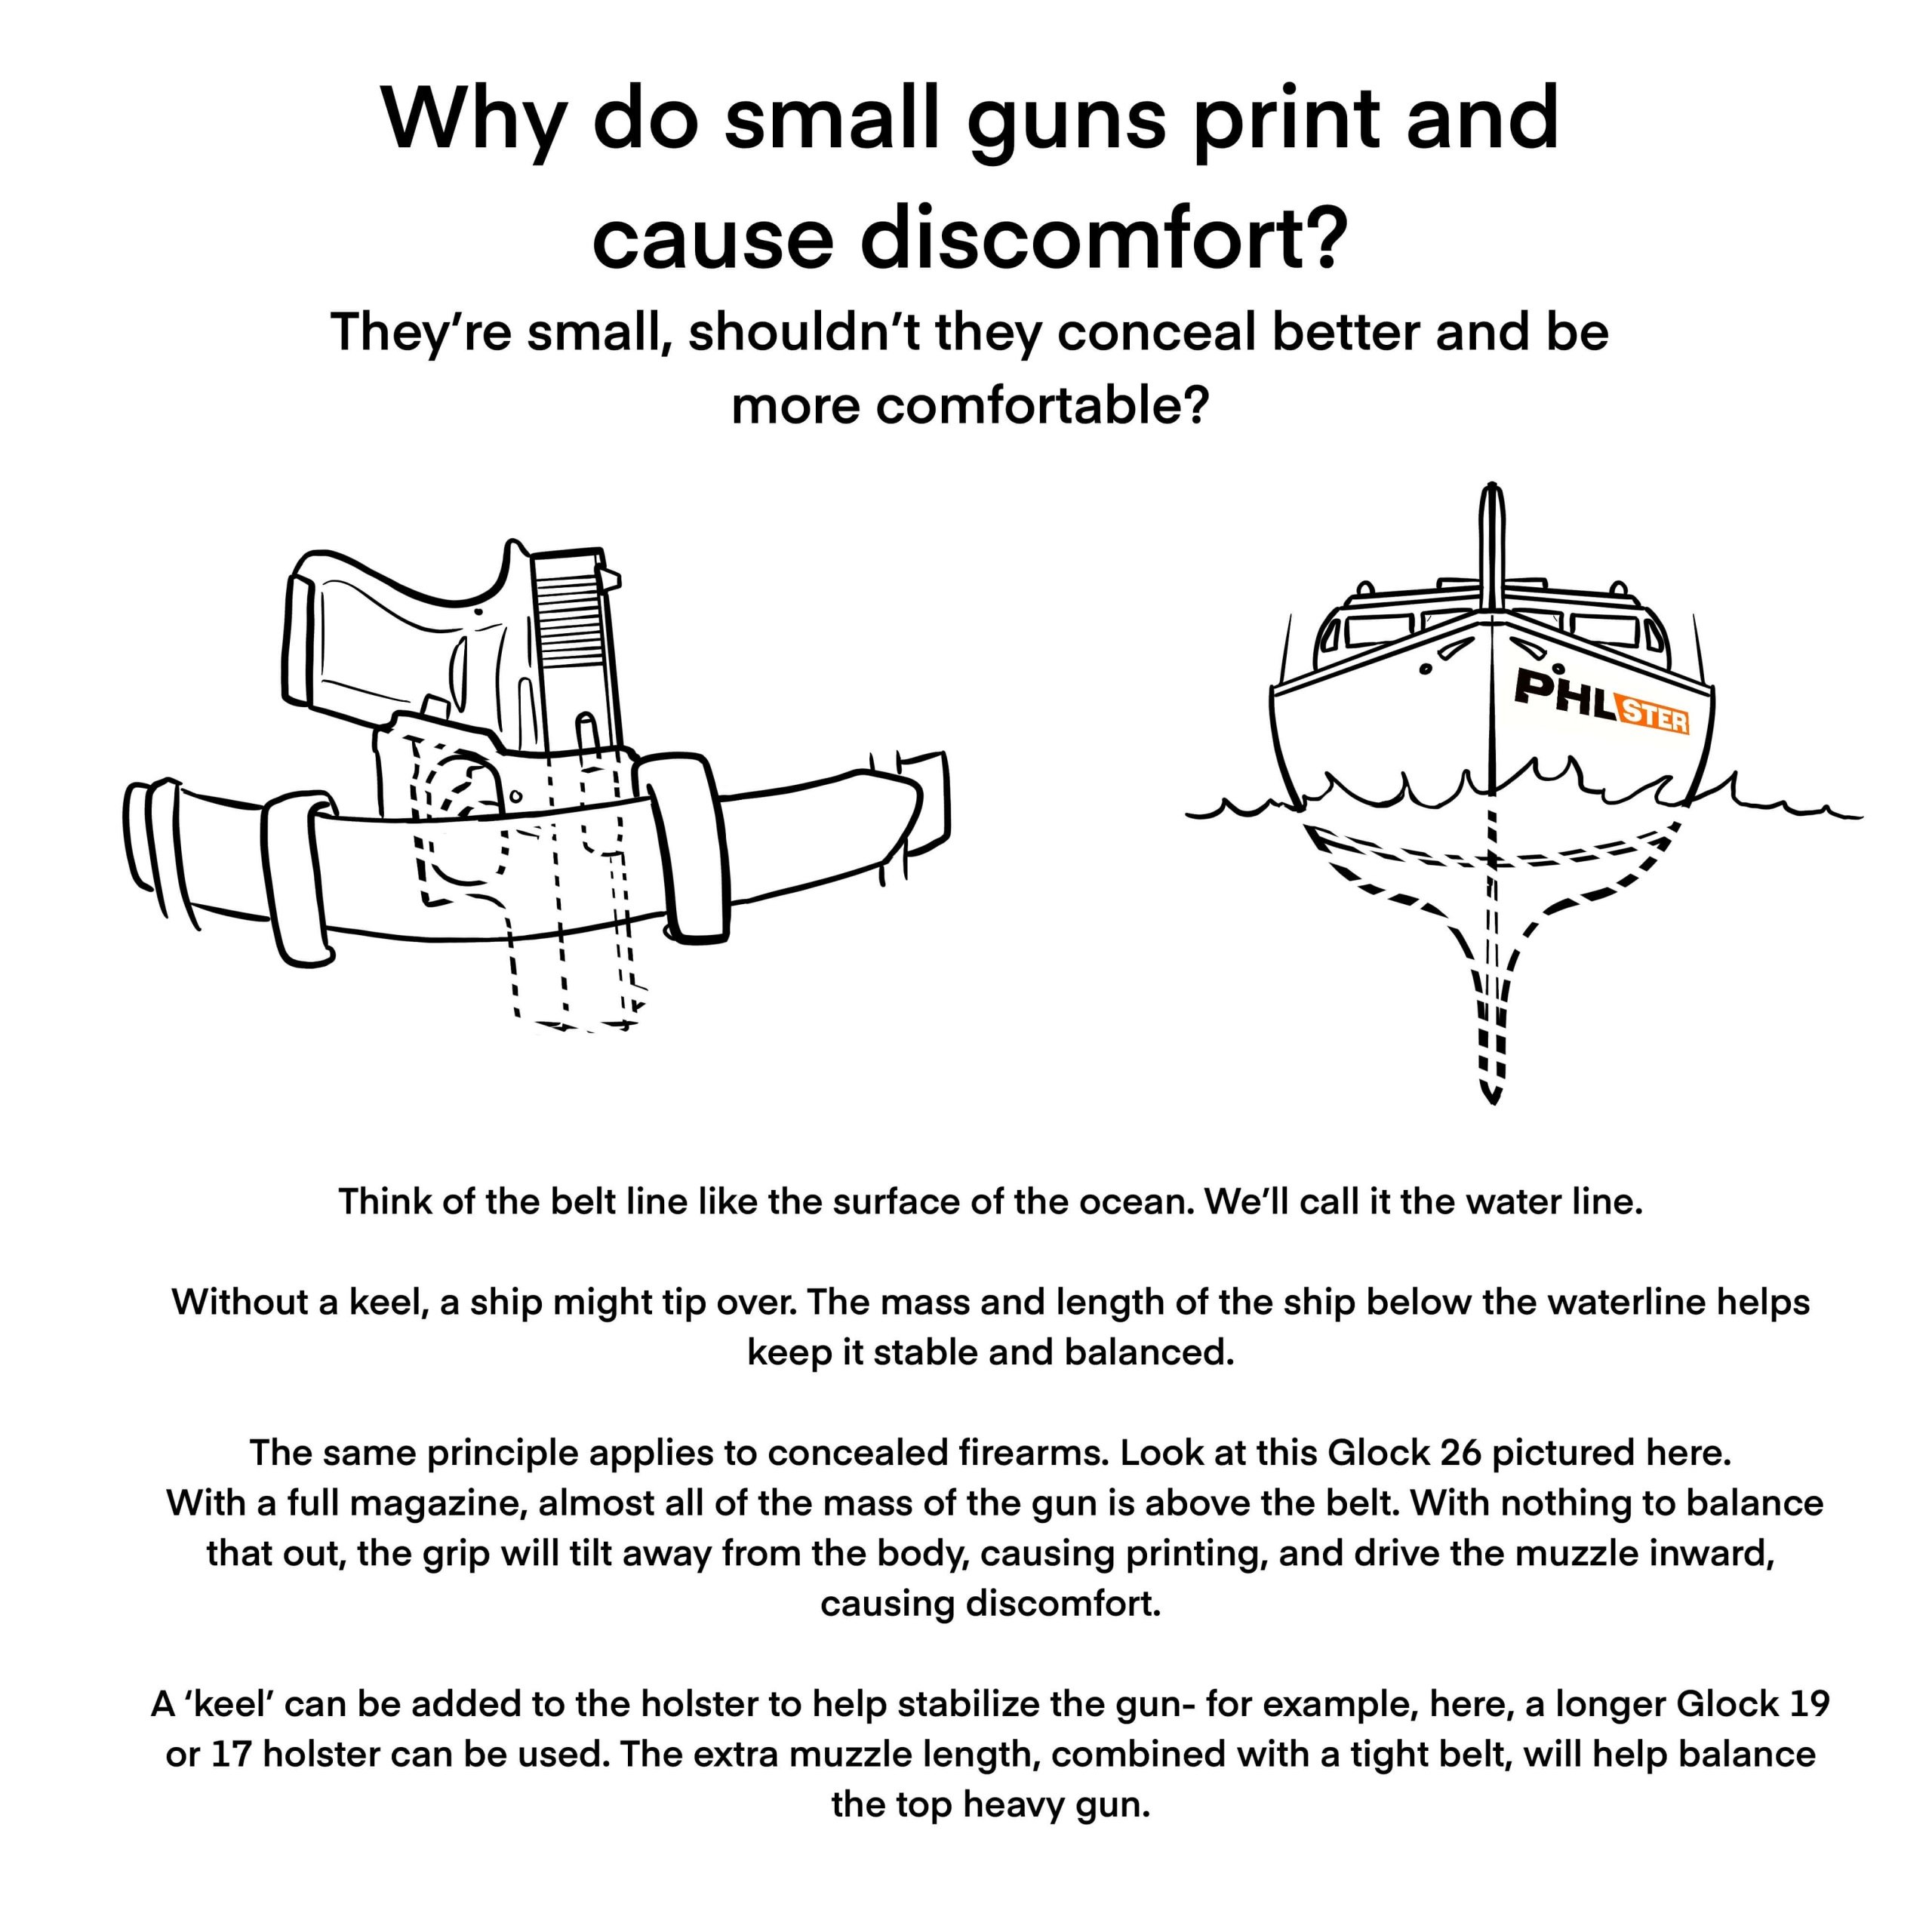
Do you need extra holster length?*
*If you’re carrying a longer-muzzled gun or a revolver, adding extra holster length may not be necessary for you, but for short semiautomatic guns, it’s often helpful.
Guns with short muzzles can be top-heavy and difficult to conceal comfortably. To solve this, some holsters have extra length added to the muzzle end. Like the keel on a boat, the extra muzzle length helps balance the holster, making it more comfortable and easier to conceal. This is especially true if you have a bit of a belly, which tends to push the grip out more and make the muzzle dig in.
Note that while extra muzzle length reduces grip printing, it can increase muzzle printing, which can be a concern with lower carry positions and tight fitting pants such as leggings or yoga pants.